


 Some days, you just need to bake. Whatever the occasion, whatever the sky.
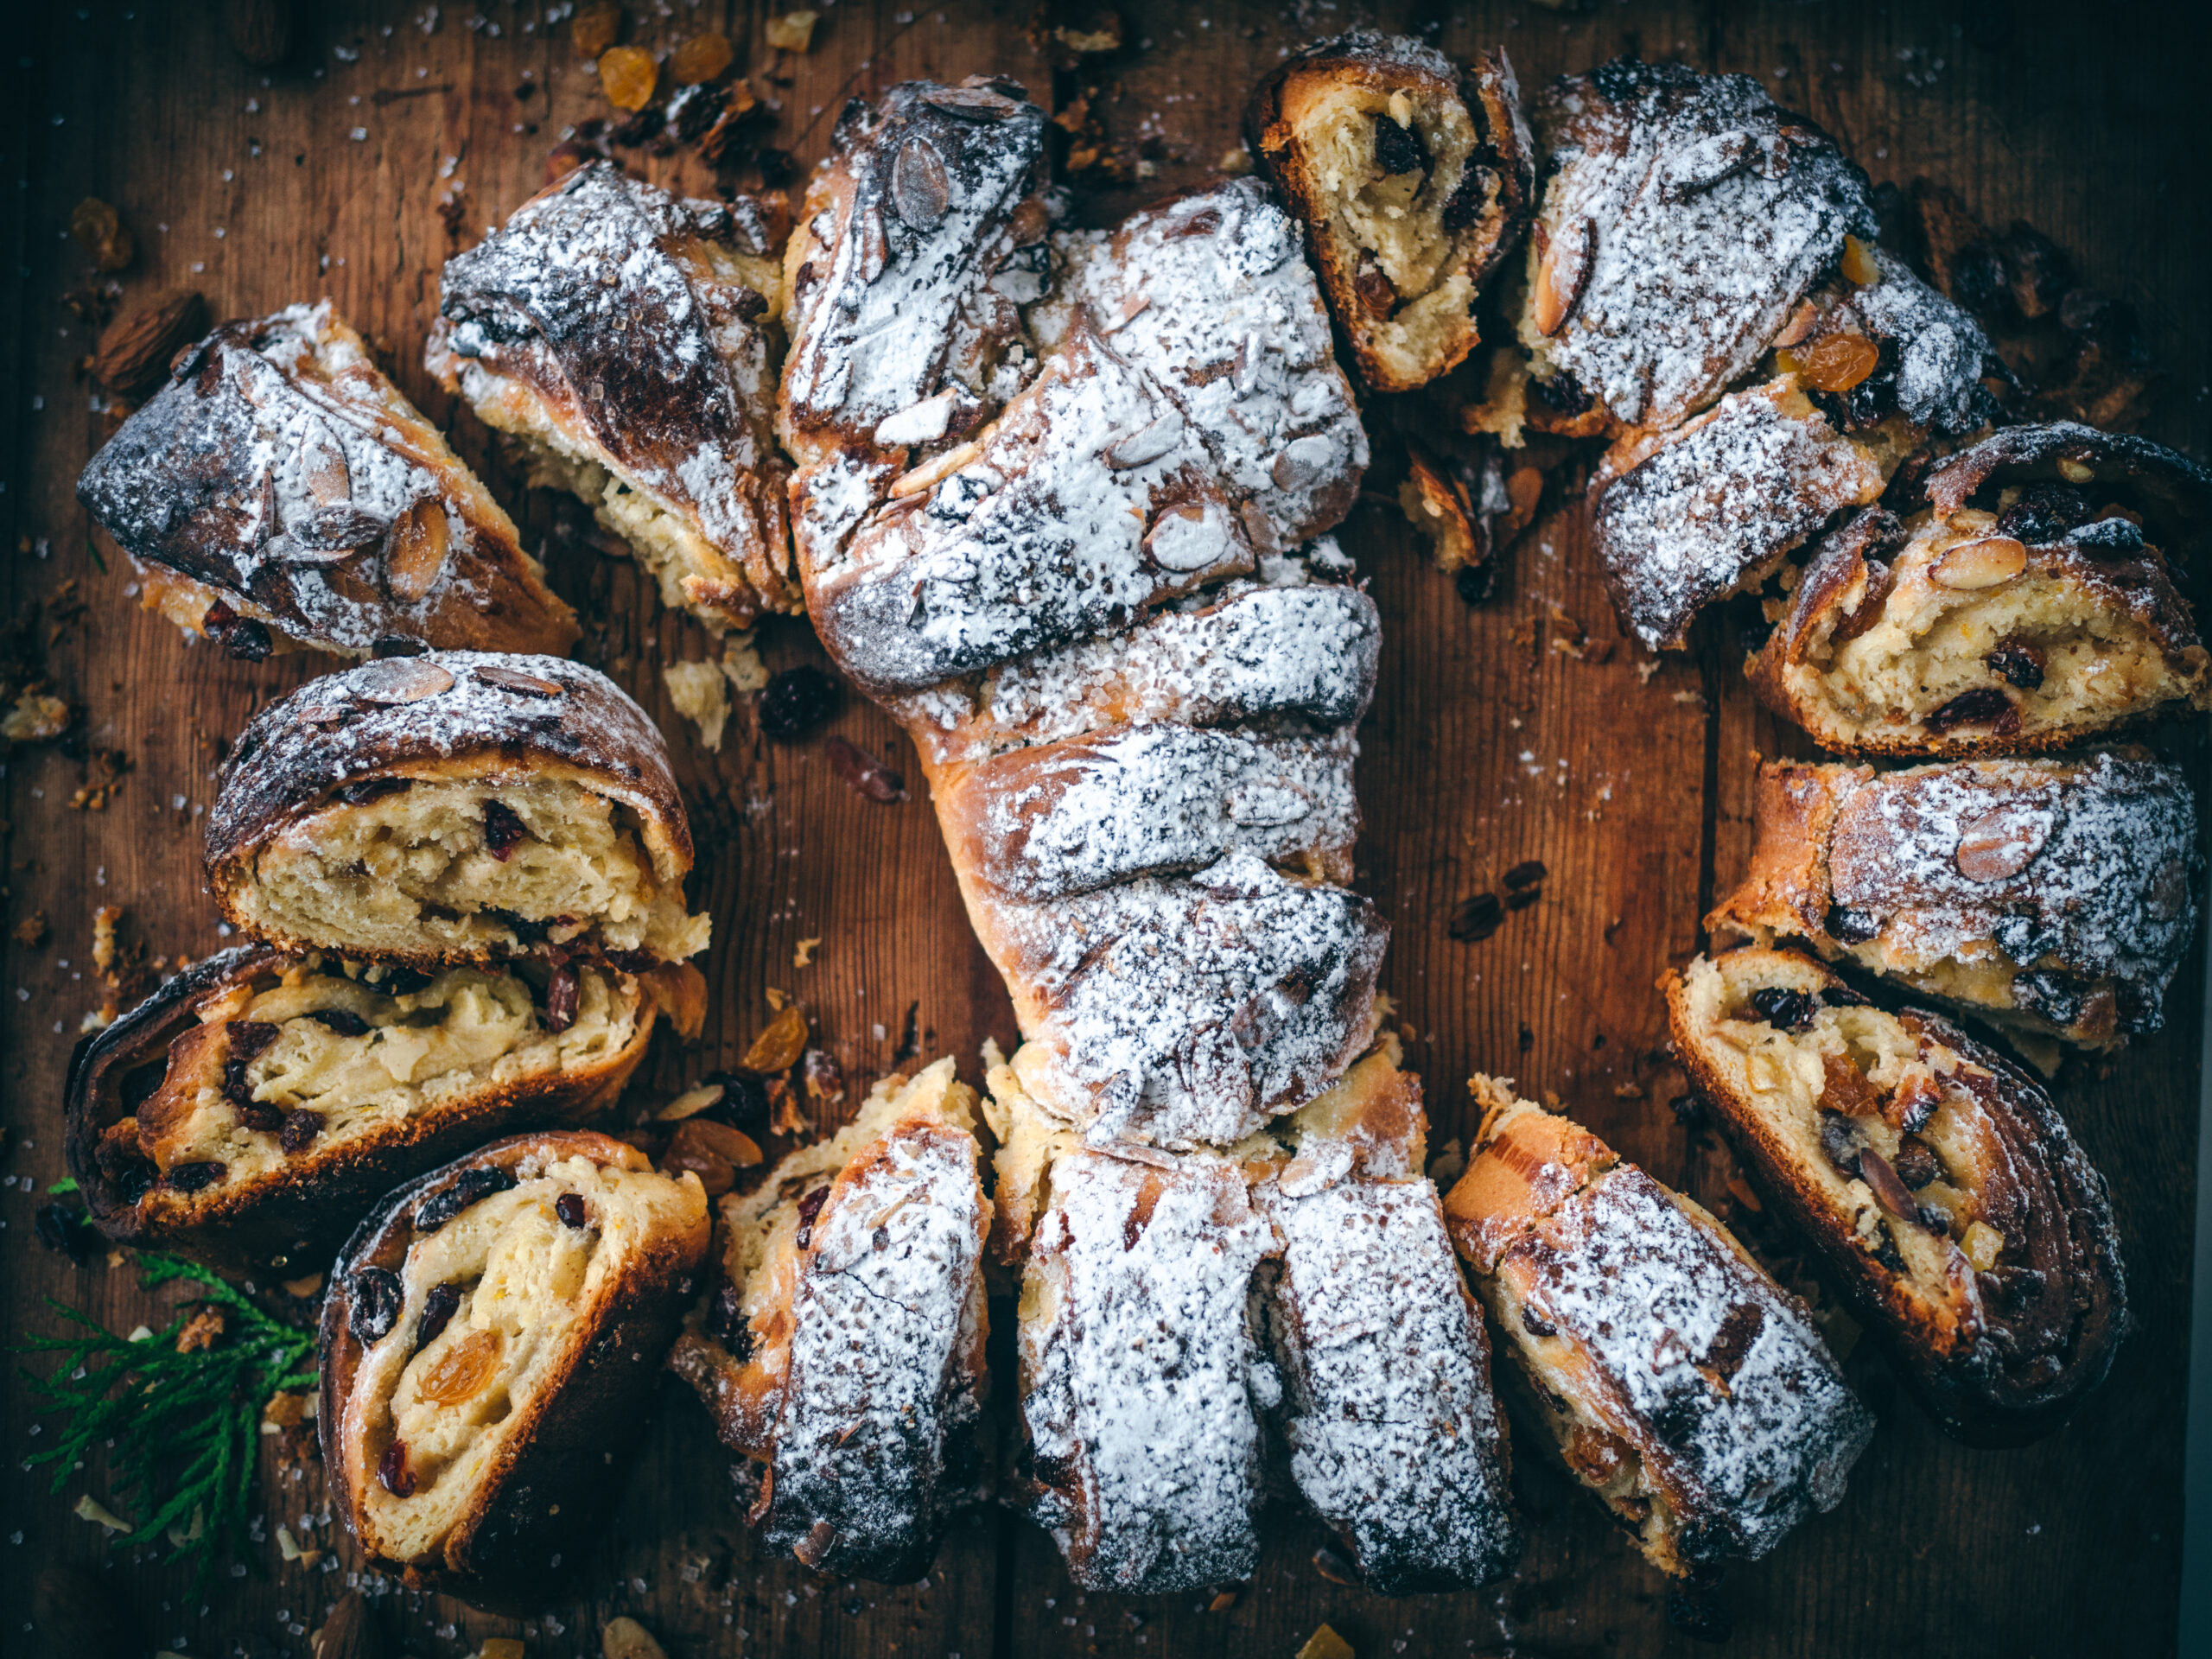
My baking day turned into days. Baked goods all around. A seamless stream of sweet things. Anytime I begin contemplating about what to bake, there is always a request for one in particular. Boller. Perhaps the most popular baked good in Norway. And perhaps one of the simplest.
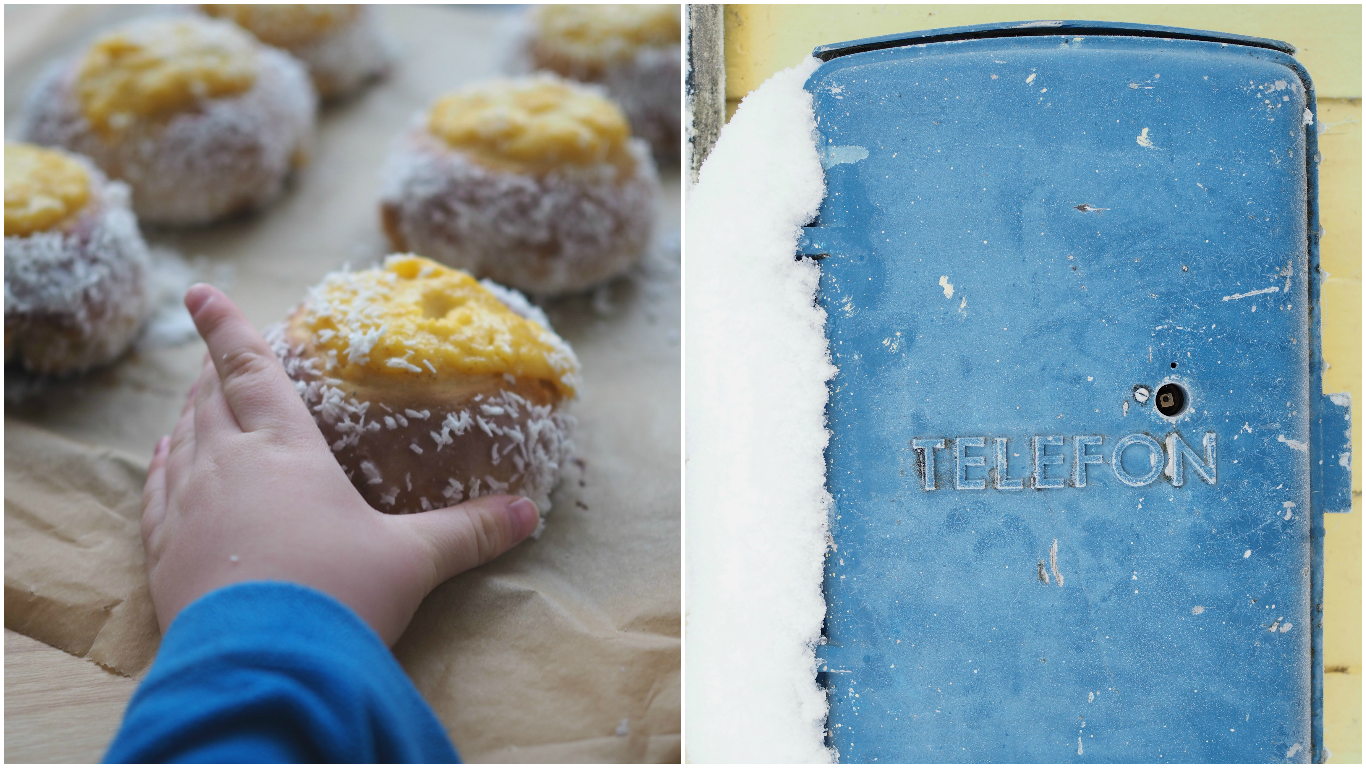
Boller are Norway’s answer to a sweet bread and instead of just being a simple yeast dough that is lightly sweetened, cardamom is added. This distinctive and flavorful spice takes baked goods to a whole new level. Anyone will tell you that cardamom is a key player in Norwegian baked goods. What’s even better about boller, is that it acts as a base to so many other great variations. One variation, in particular, looks like snowfall on a sunny day. And perhaps, in one way or another, this time the sky was my inspiration to get in the kitchen and bake.
 Skoleboller, translated as ‘school buns’, are just one variation of the Norwegian boller. Where you are in the country will determine the name by which these particular buns are referred to. The west refers to them as skoleboller, while in the east, they are referred to as skolebrød. Other areas will call them by other names, such as tolvøres, pai, purke, sånn med gul I midten, and lørdagsgodt.
It’s difficult to pinpoint the origin of skoleboller. To know who created them or why. What is typically told about them is that starting around the 1950s, they were placed in children’s school lunch packs as a treat. Hence the reference to ‘school buns’ (skoleboller) or ‘school bread’ (skolebrød).
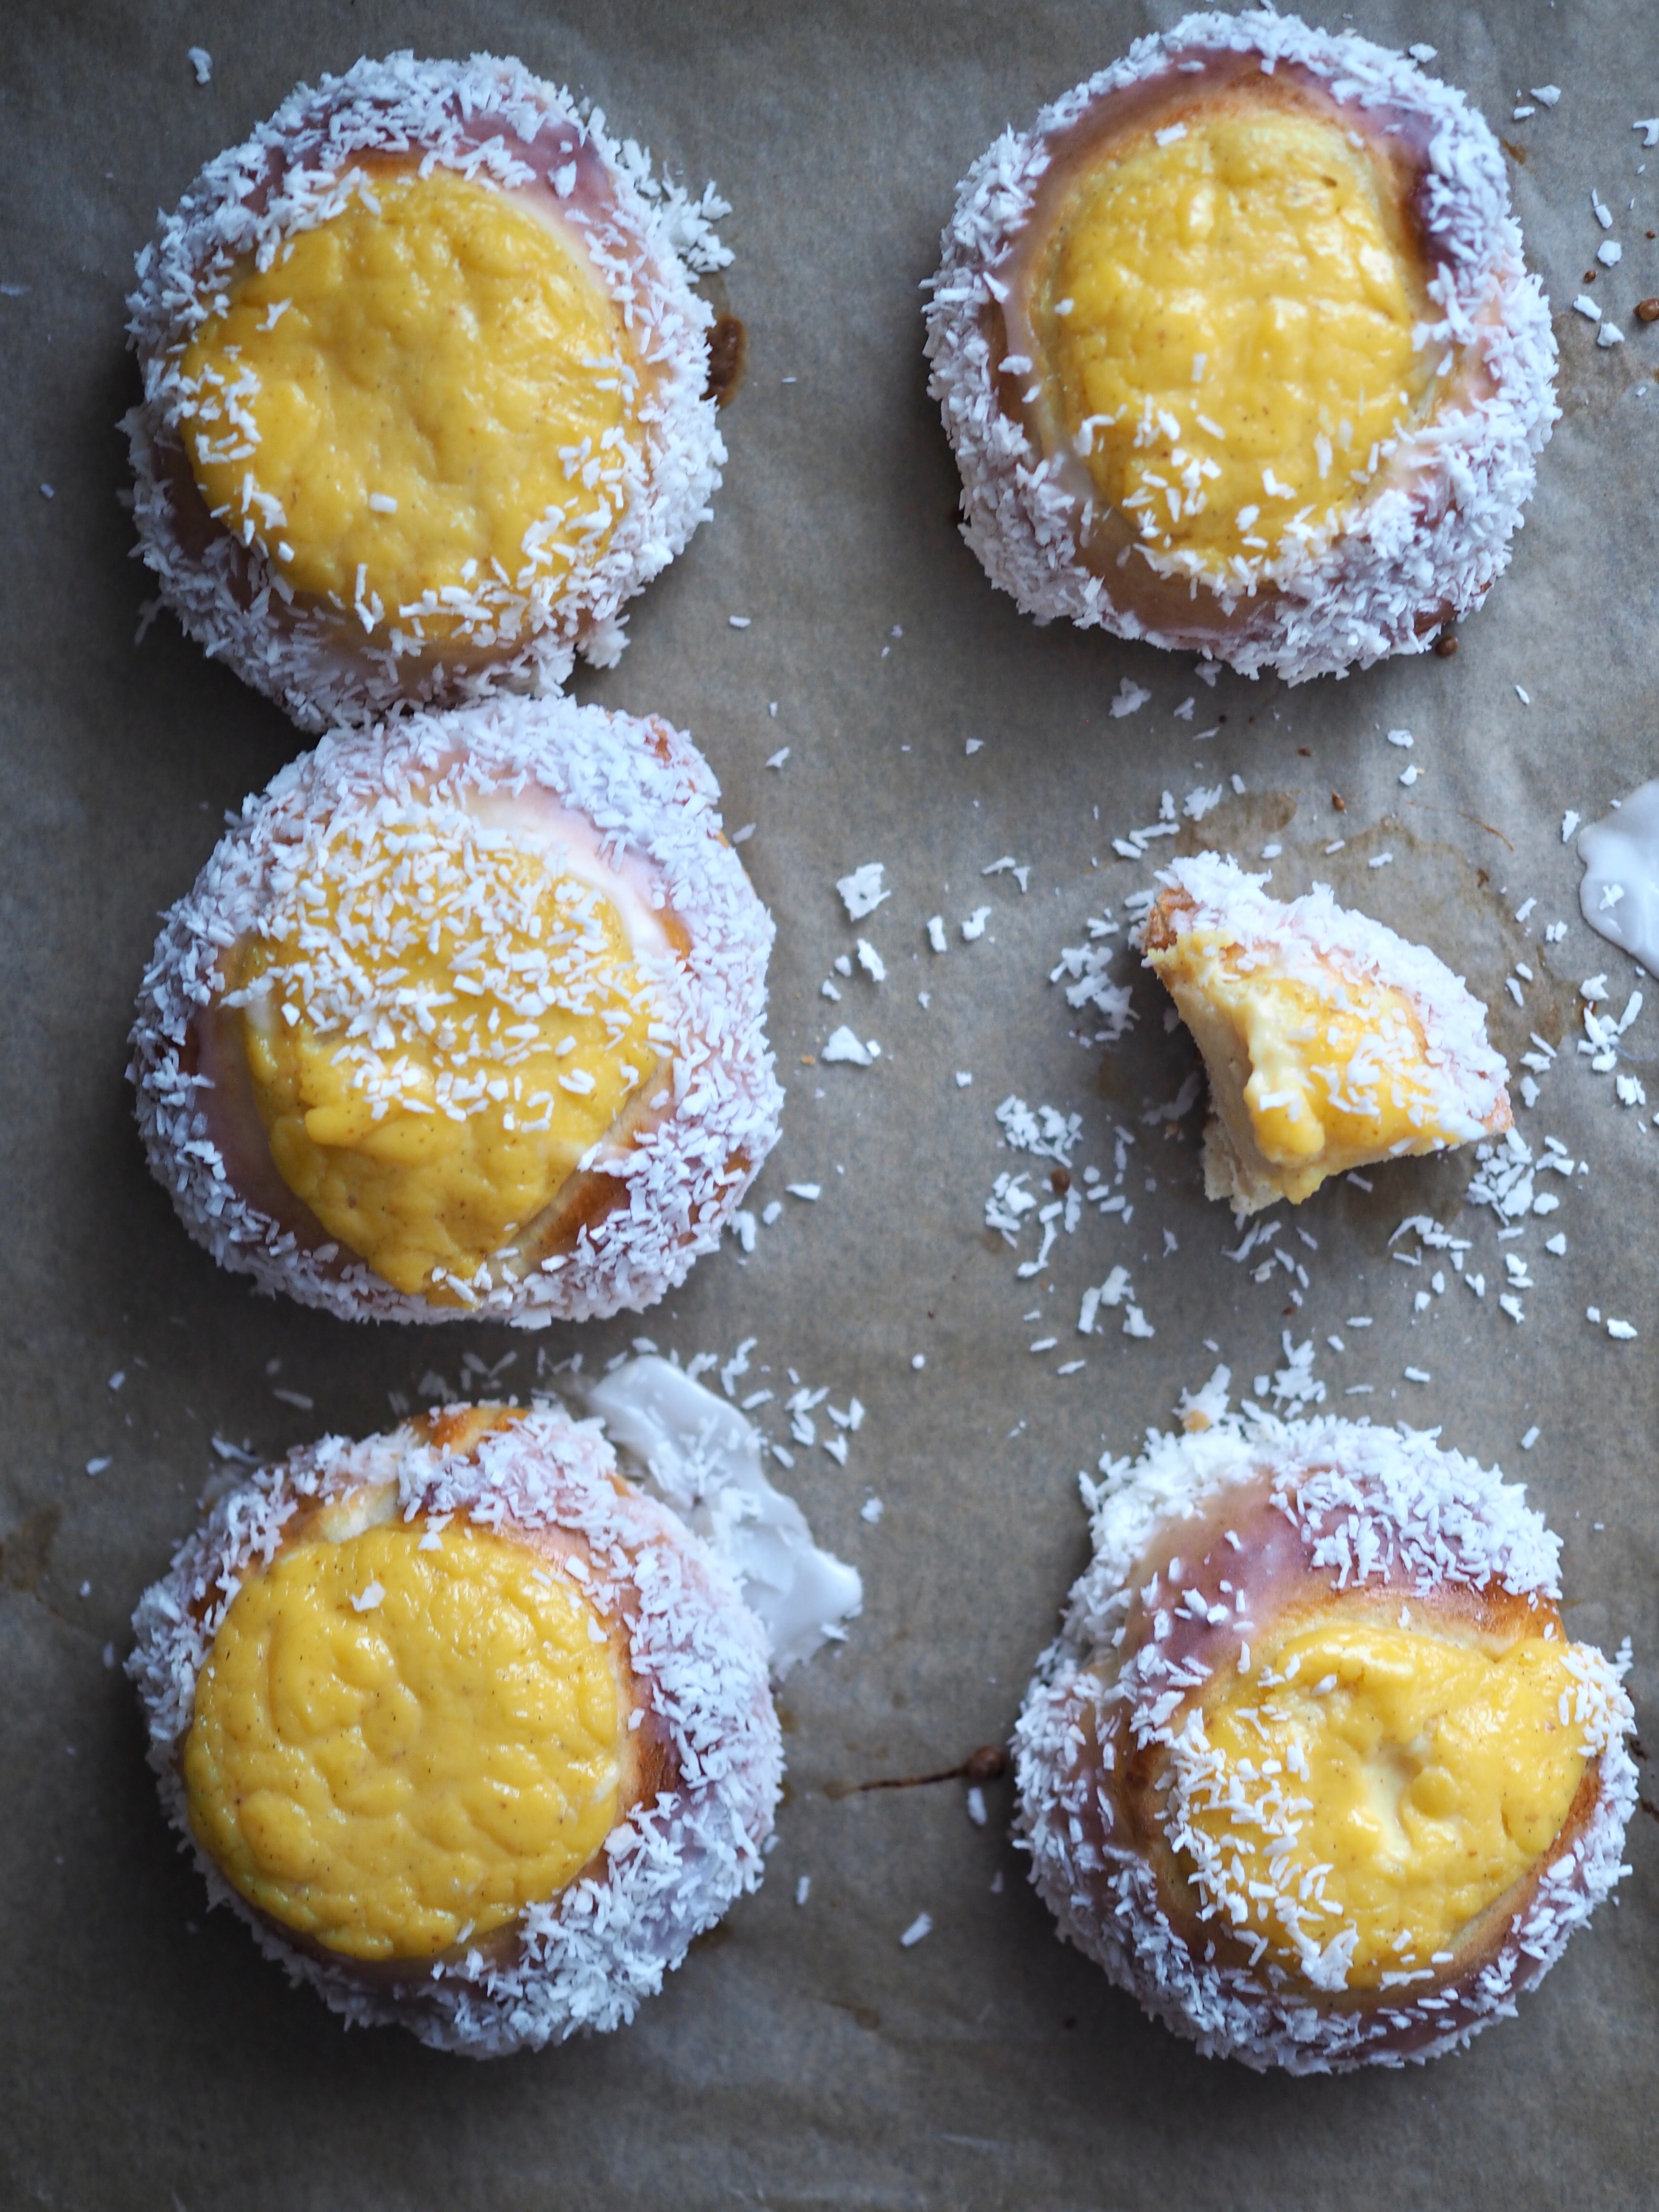
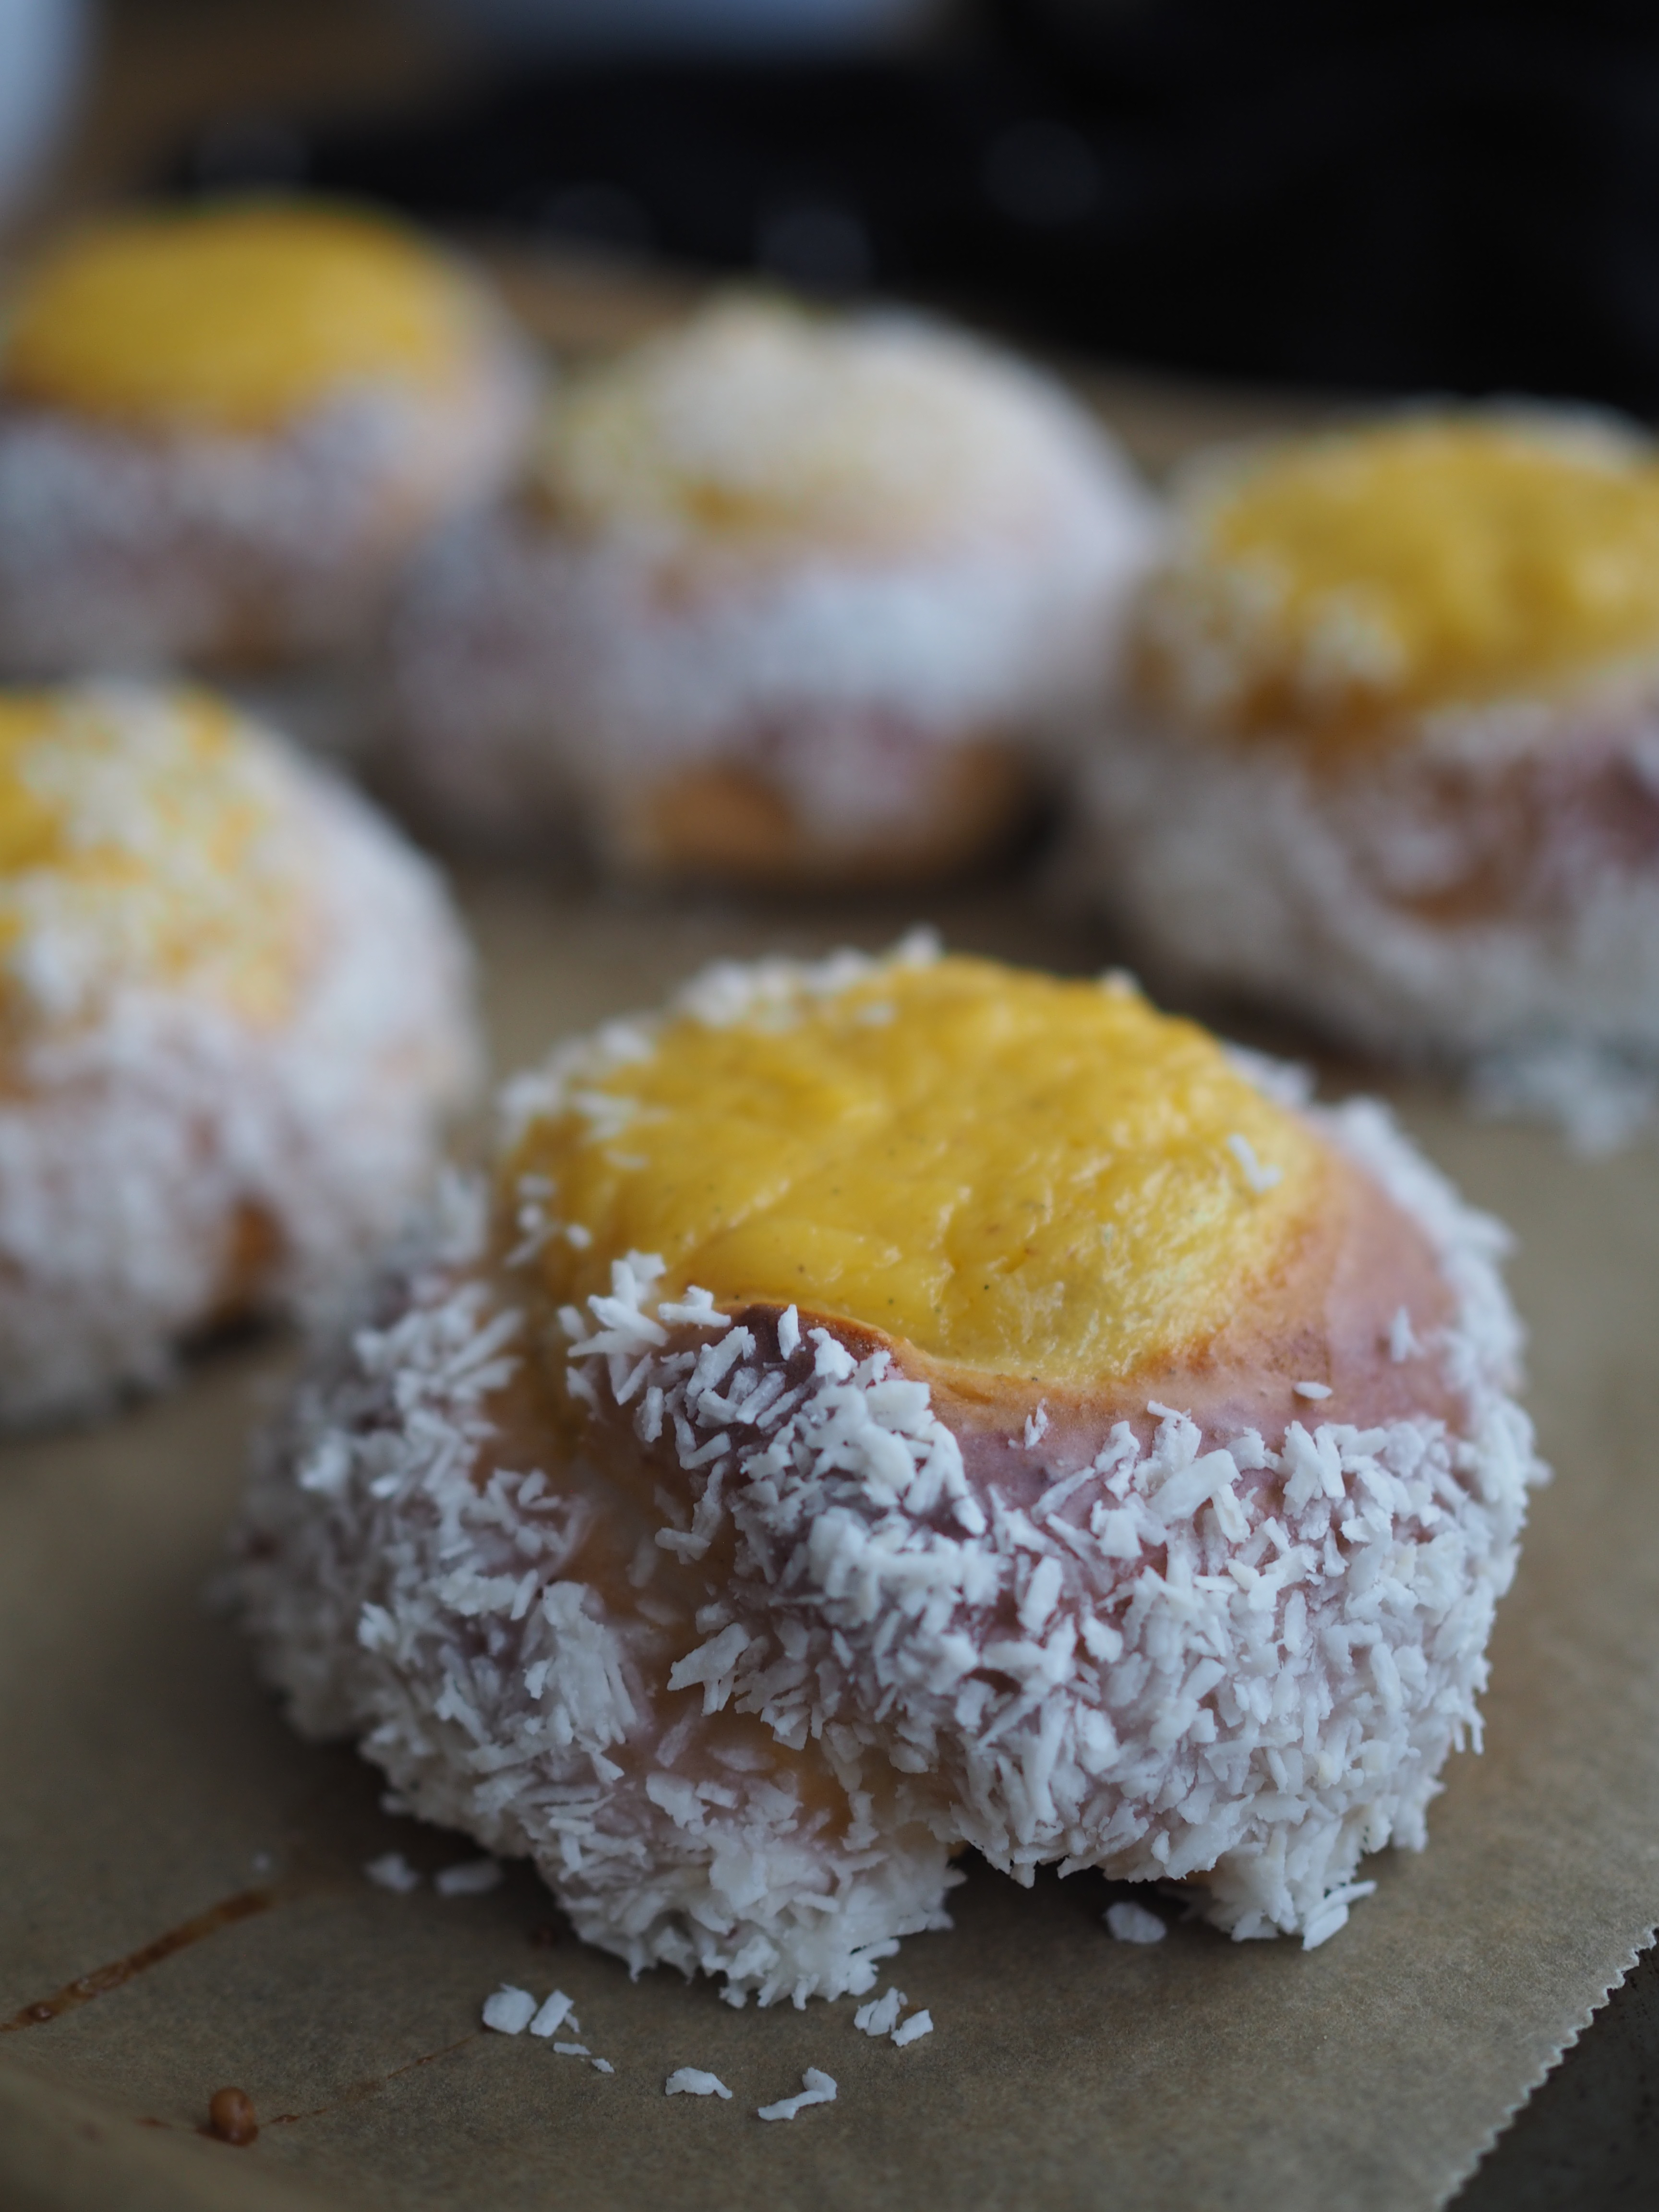
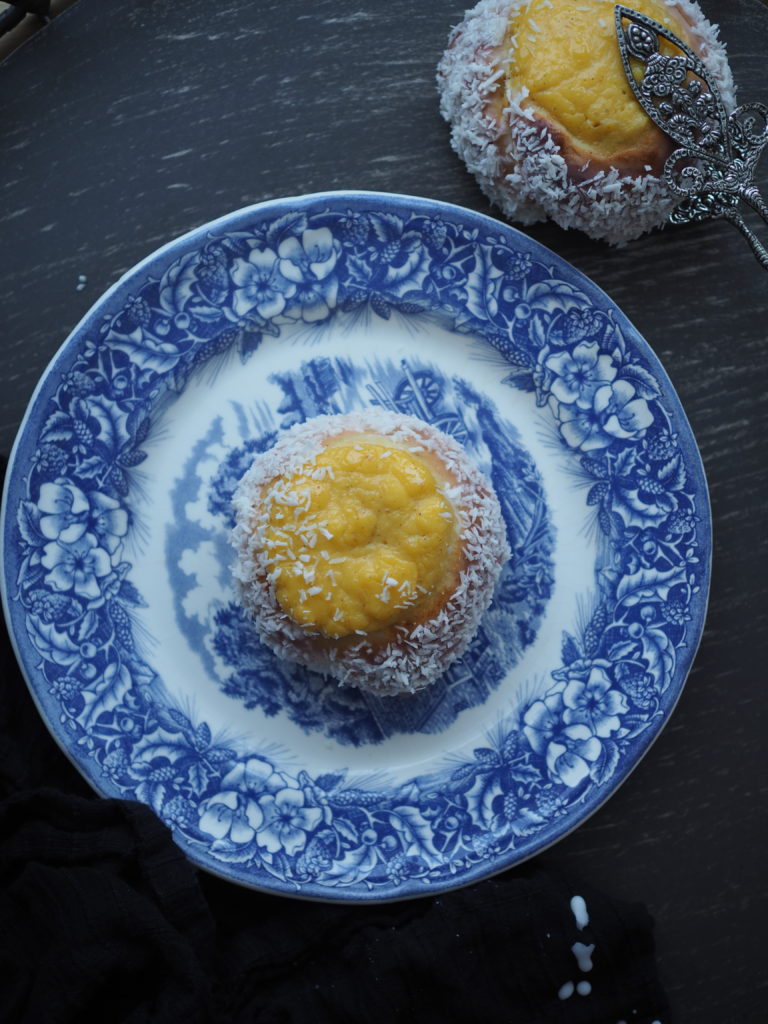
 Nowadays, these alluring buns with their flakes of coconut clinging to a sweet glaze and a generous portion of golden custard are a familiar favorite found everywhere. No longer confined to the school box, skoleboller are proudly displayed in bakeries, grocery stores, cafes, gas stations, and, of course, the home.
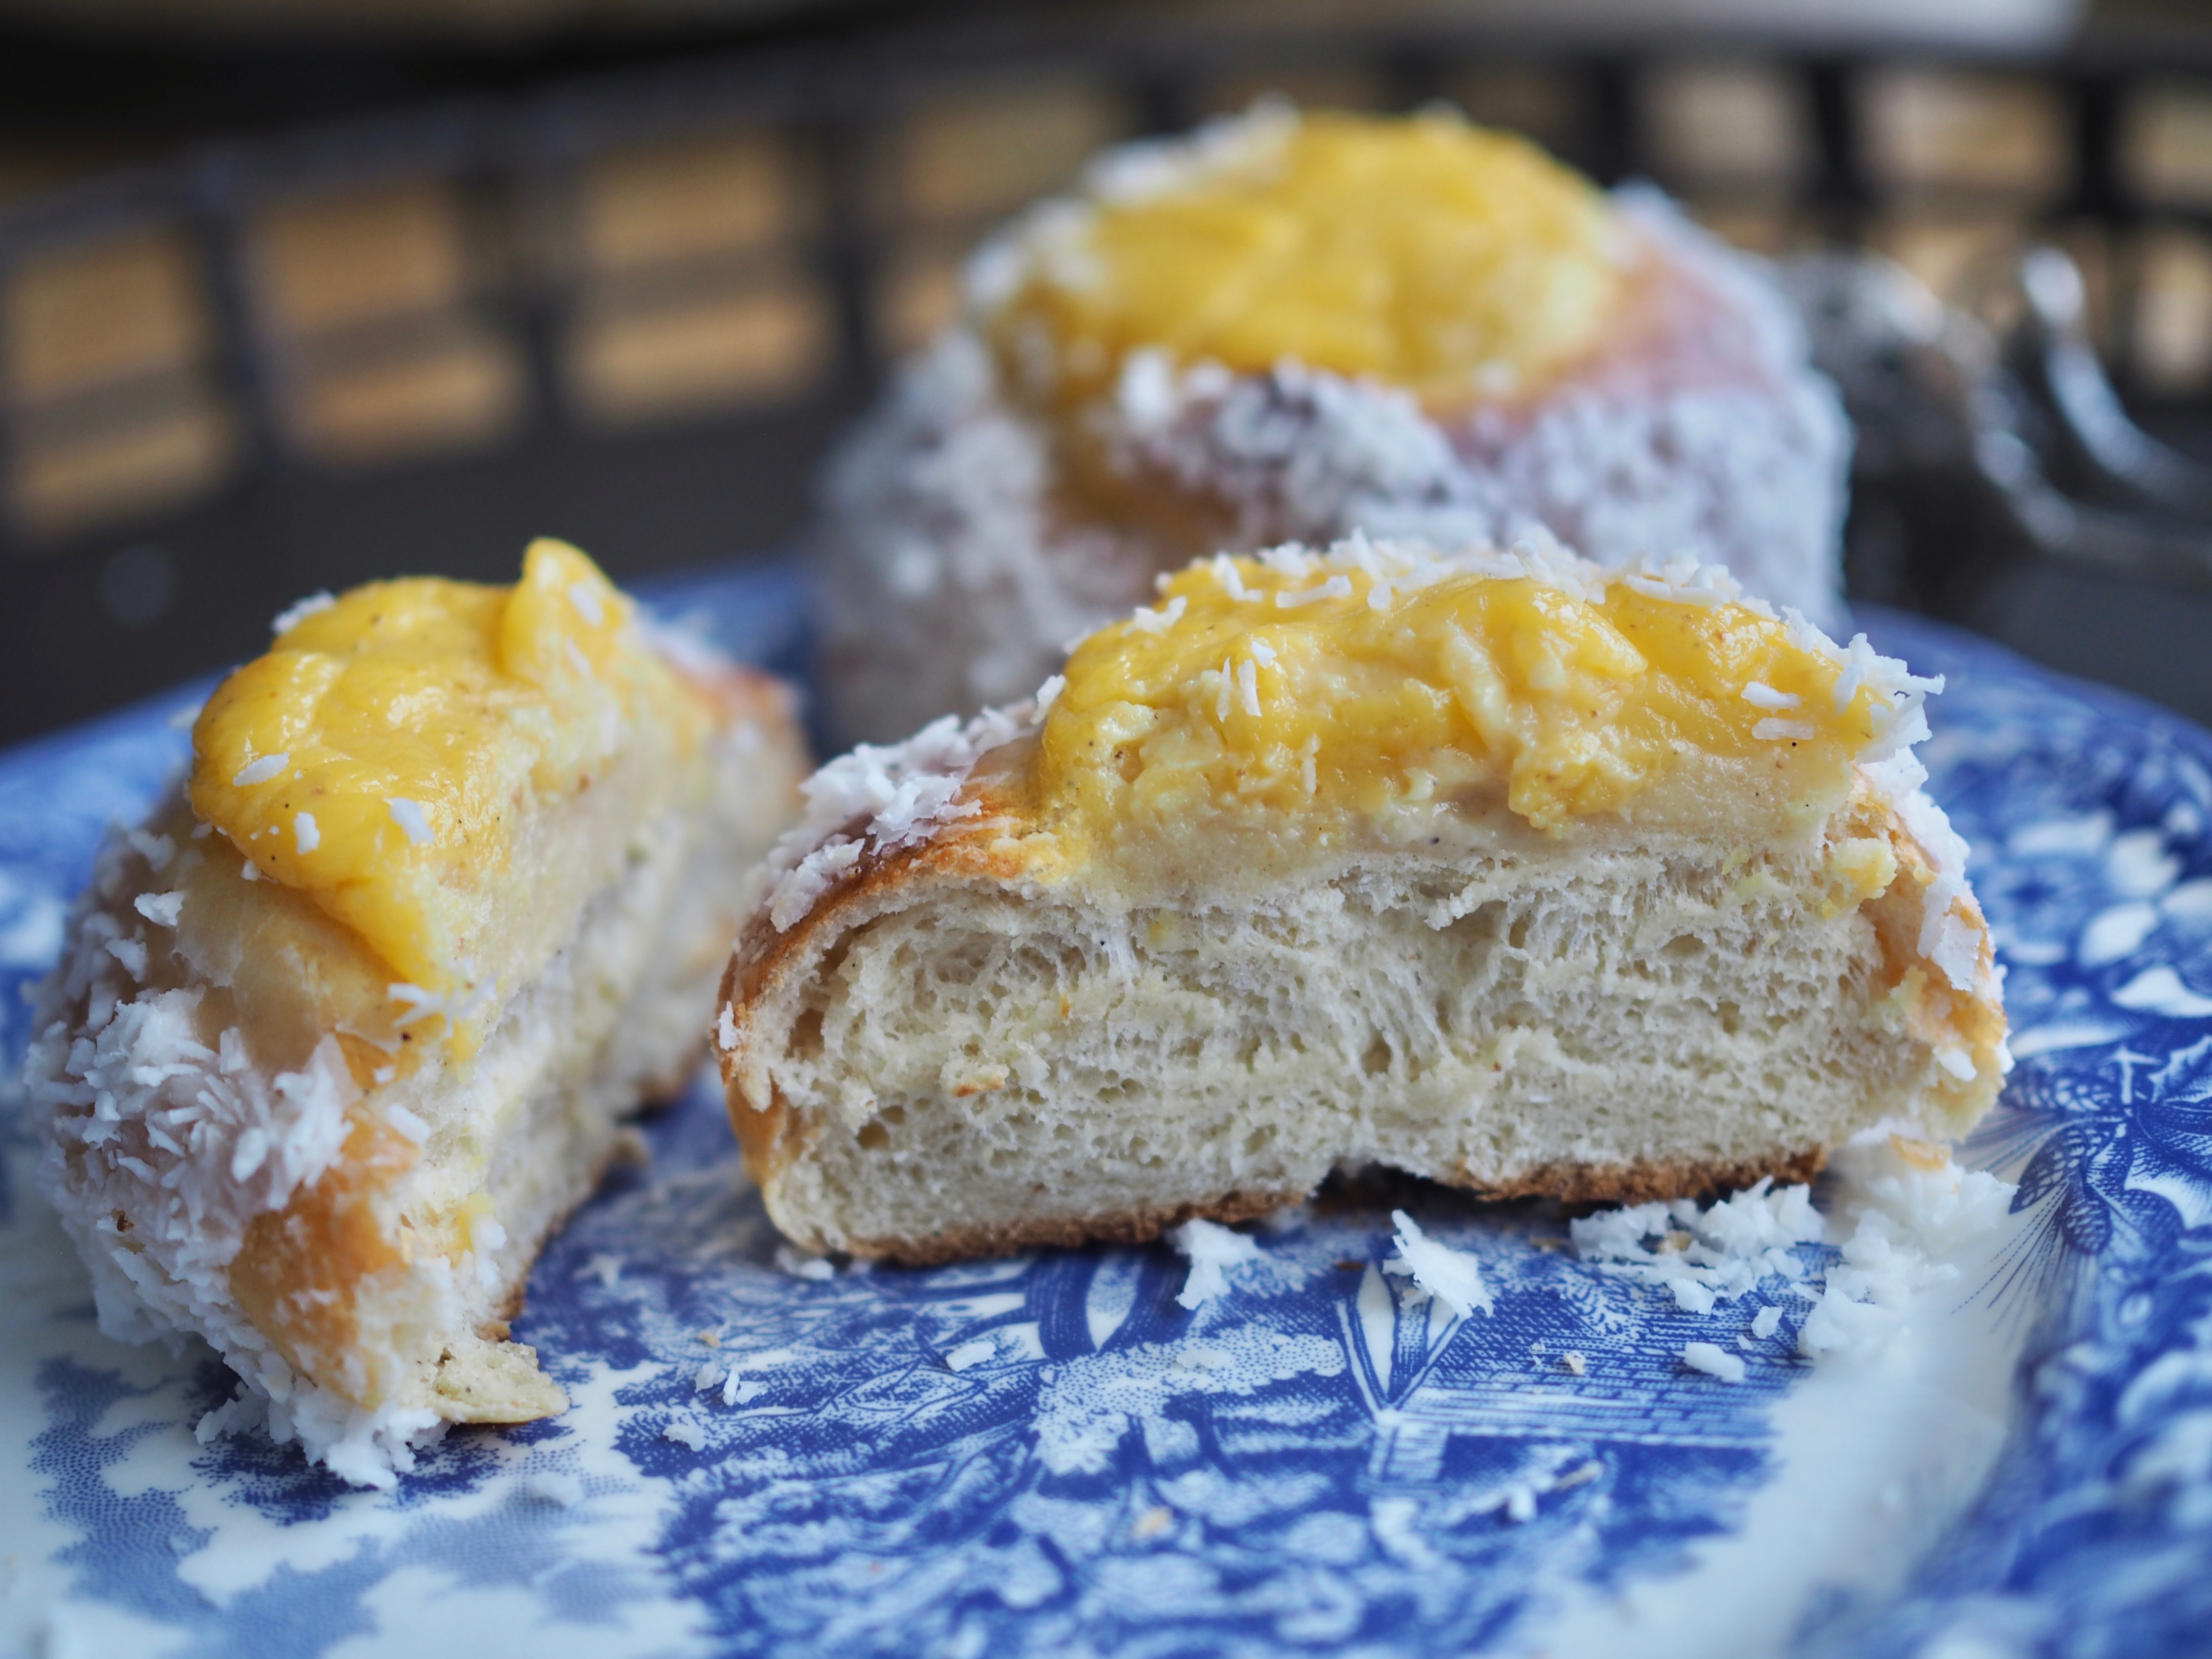
Homemade skoleboller are nothing short of amazing. Of all the skoleboller I have tried, in all the various locations, nothing comes close to the homemade version. I have perfected my own recipe for the ultimate boller – soft, airy, elastic, and with just the right amount of cardamom to let you know that it’s there without being obtrusive. Paired with my go-to vanilla custard and a simple glaze with dried coconut flakes, I found my perfect skoleboller. Sunshine, no matter what the sky.
 This recipe makes 12 scrumptious skoleboller, but you can, of course, double the recipe if need be. These are fun to make, and the process is quite simple. These are guaranteed to become a baked favorite!
Skoleboller (Norwegian Buns with Custard & Coconut)
(Makes 12 skoleboller)
Ingredients:
Boller
- 3 dl (1 ¼ cups) milk (use whole, 1% or 2%)
- 1 egg
- 500g (3 ¼ cups) flour
- 75g (1/3 cup) sugar
- 2 tsp cardamom
- ¼ tsp salt
- 25g fresh yeast or 8.5g of dry yeast
- 75g butter (1/3 cup), cut into pieces
Vanilla Custard
- 2 egg yolks
- 55g (1/4 cup) sugar
- 2 Tb corn starch
- 5 dl (2 cups) whole milk
- ½ vanilla pod
Glaze
- 3 dl (1 cup) powdered sugar
- 3 tsp egg white
- 3 tsp water
- 4 dl (1 ½ cups) of shredded coconut
- 1 egg, lightly beaten for brushing
To make the boller, start by gently warming the milk in a saucepan. You want it to be a little more than lukewarm. In a food mixer, with a dough hook, place all of the dry ingredients inside (if using fresh yeast, just break it up with your fingers first) and make sure that the salt and the yeast do not touch.
Add the warmed milk and the egg.
Turn the mixer on low and knead for about 8 minutes without stopping.
Stop the mixer and add the butter to the dough. The reason for adding the butter now, rather than at the beginning, is because fats can slow down the gluten process as it can hinder water absorption that the proteins need to form gluten. By adding the butter after the dough is kneaded, you will get better gluten development resulting in a better quality dough which is light and airy. And because the dough will be warm from the kneading, the butter will melt into the dough. Once you have added the butter, turn the machine on to medium speed for 5 more minutes. The dough will be very elastic and somewhat ‘moist’, this is exactly what you are looking for!
Place the dough in a greased bowl, cover with a tea towel and let rise in a warm spot for 1 hour, until the dough has doubled in size.
While the dough is rising, make the custard by whisking together the sugar and egg yolks in a bowl (save the egg whites for later use in the glaze). Add the cornstarch and blend until the mixture is pale yellow and thick.
Place the whole milk in a saucepan and add the vanilla beans by scraping them from the pod and discarding the pod afterwards. Warm the milk just before it begins to boil, without letting it boil. Take it off the heat.
Steadily and slowly, add the milk to the bowl with the sugar mixture, whisking constantly to avoid any curdling of the eggs. When you have mixed everything together, pour it back into the saucepan and return to the stove. Over medium heat, cook the mixture until it has thickened. You want the custard to be more on the thick side since it will be placed inside the buns. Remove from the heat and allow to cool completely. If you wish, you can transfer the custard to a strainer and push gently through to remove any bits of curdled egg. Place plastic wrap over the top until you are ready to use it.
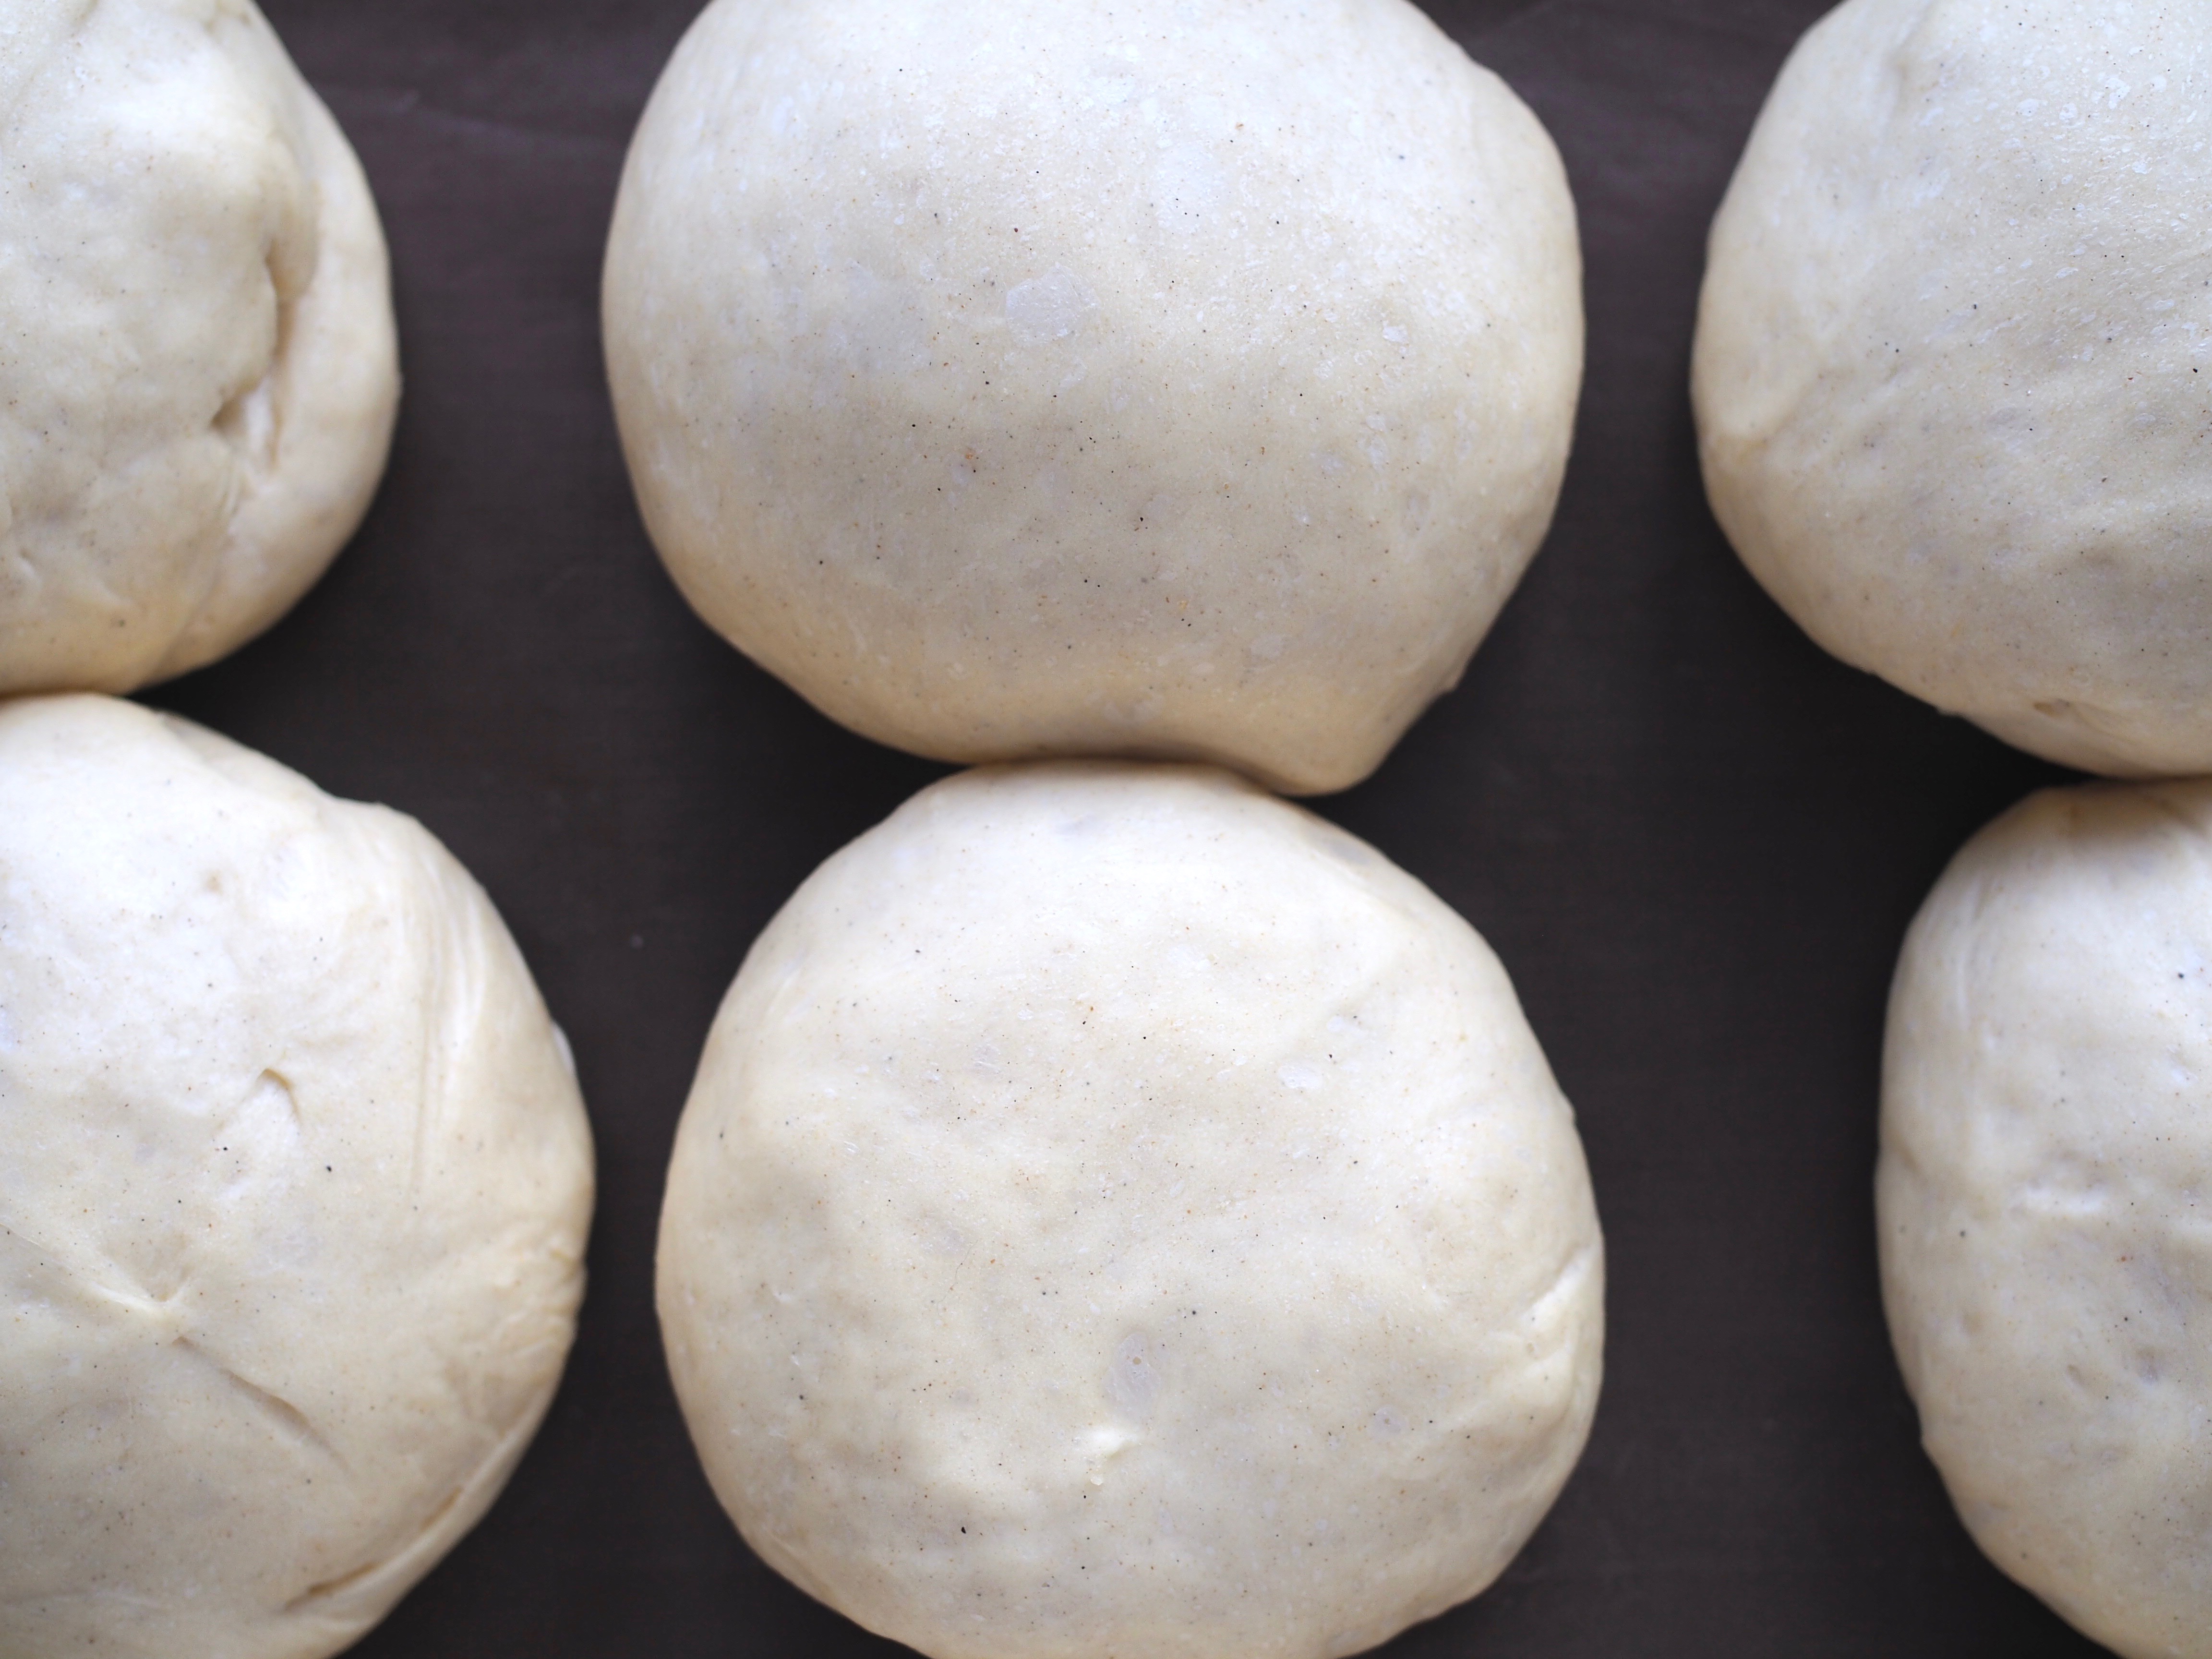
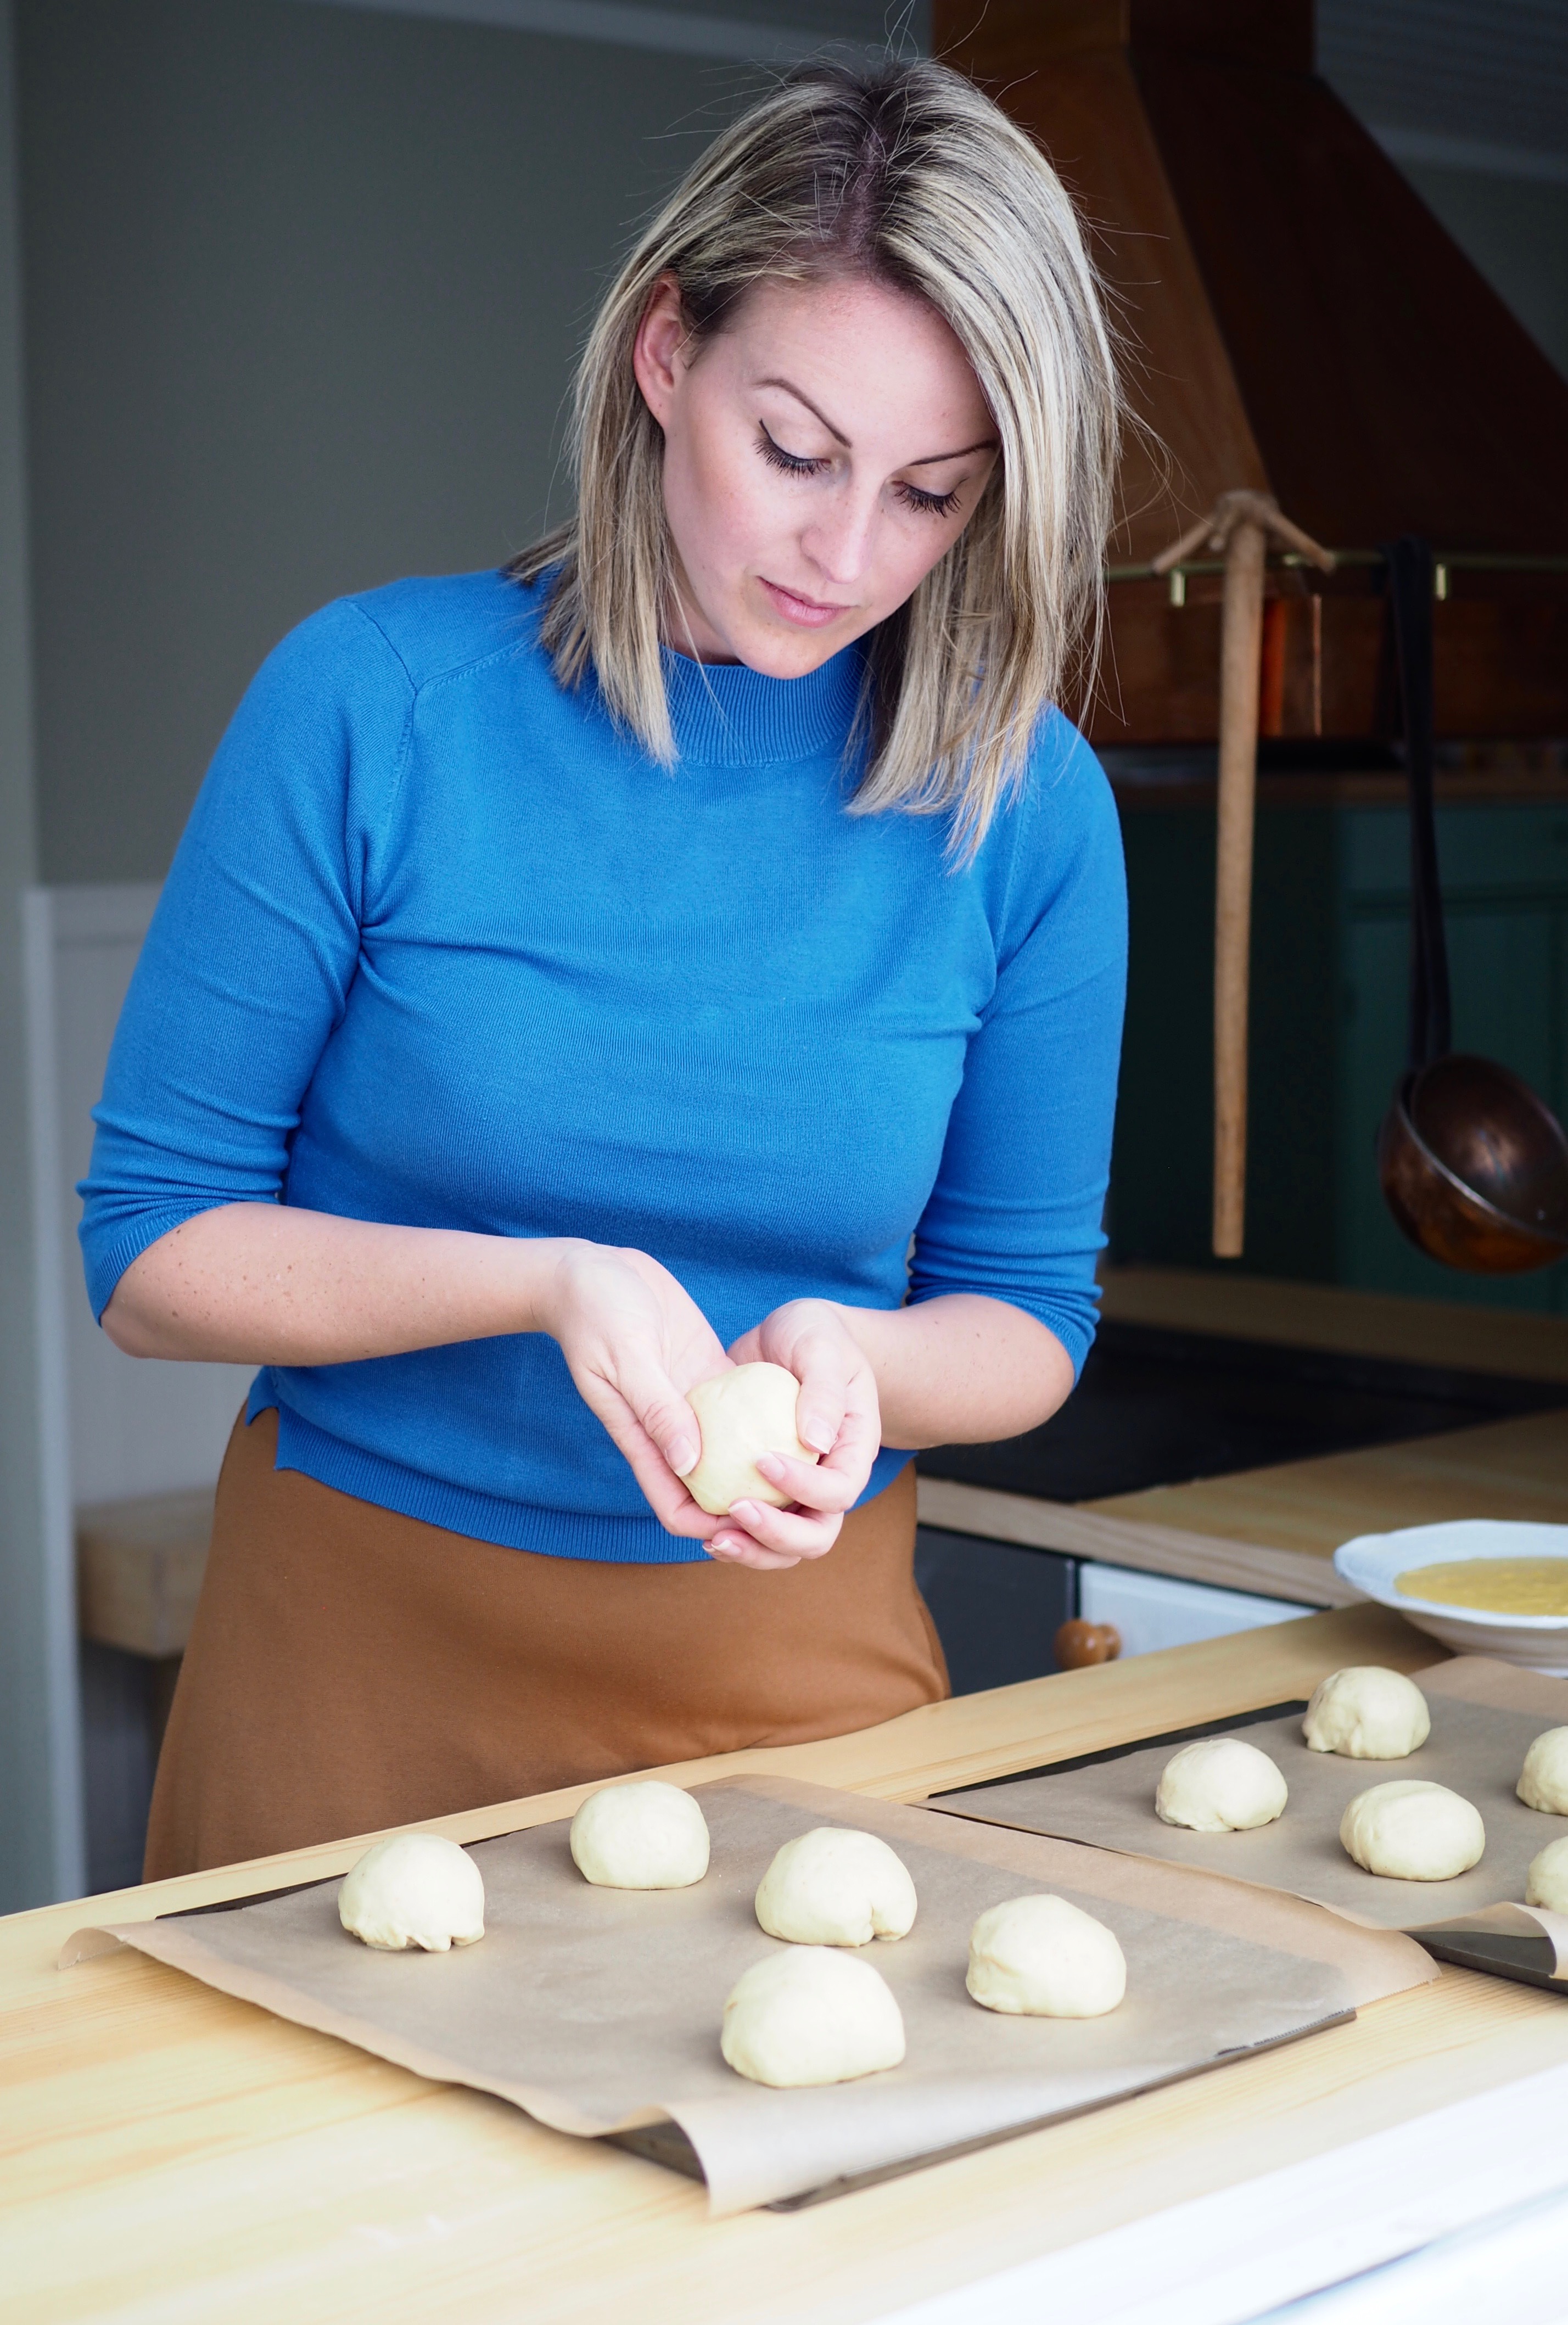
When the dough has finished rising, take it out and place it on a lightly floured surface. Form the dough into a large ‘sausage’ and cut it into 12 pieces. Roll each piece into a round bun and place half of the buns on one prepared baking sheet and the other half on another prepared baking sheet, leaving a good amount of space between each bun. Cover each sheet with a tea towel and let the buns prove for another 30 minutes.
While the buns are proving, make the glaze. In a small bowl, mix together the powdered sugar, egg white and water until a nice glaze forms. In a separate bowl, wide enough to fit the buns, place the coconut.
Preheat the oven to 225°C/450°F.
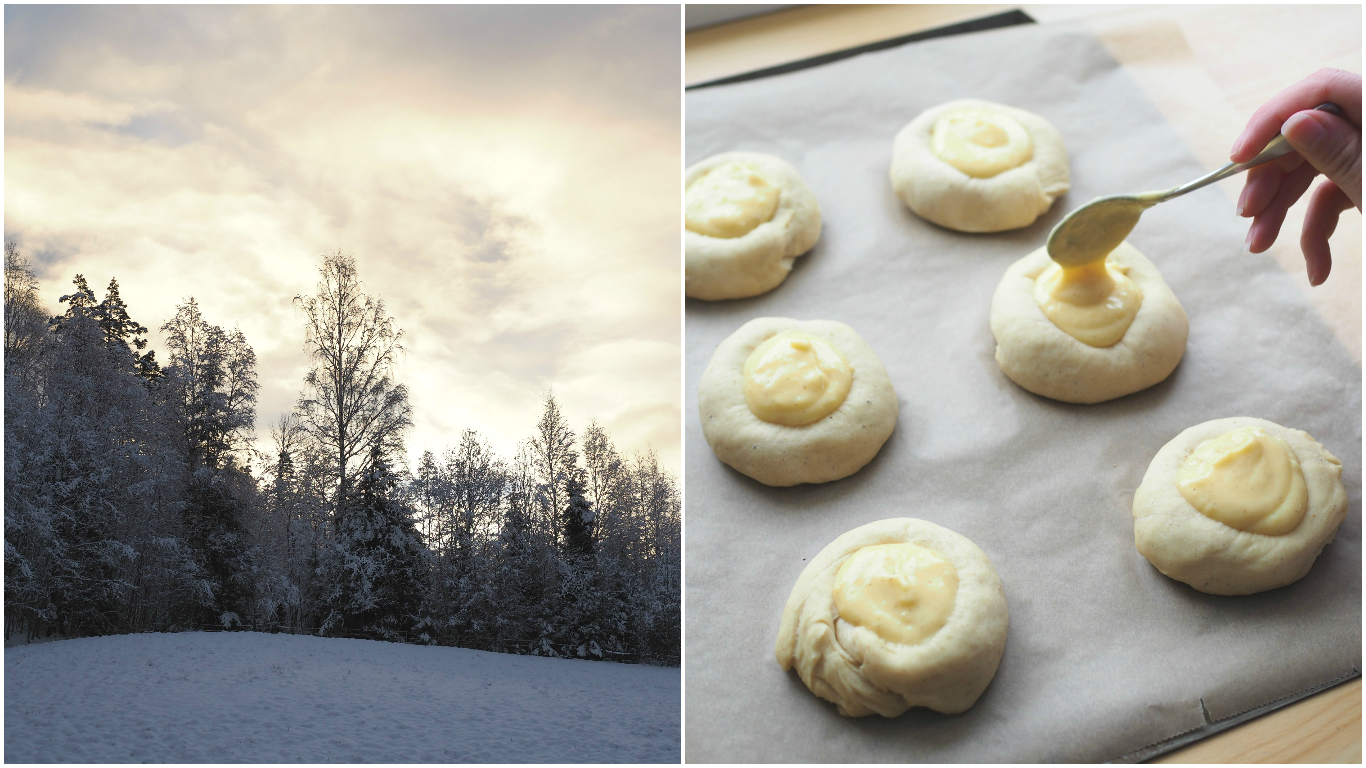
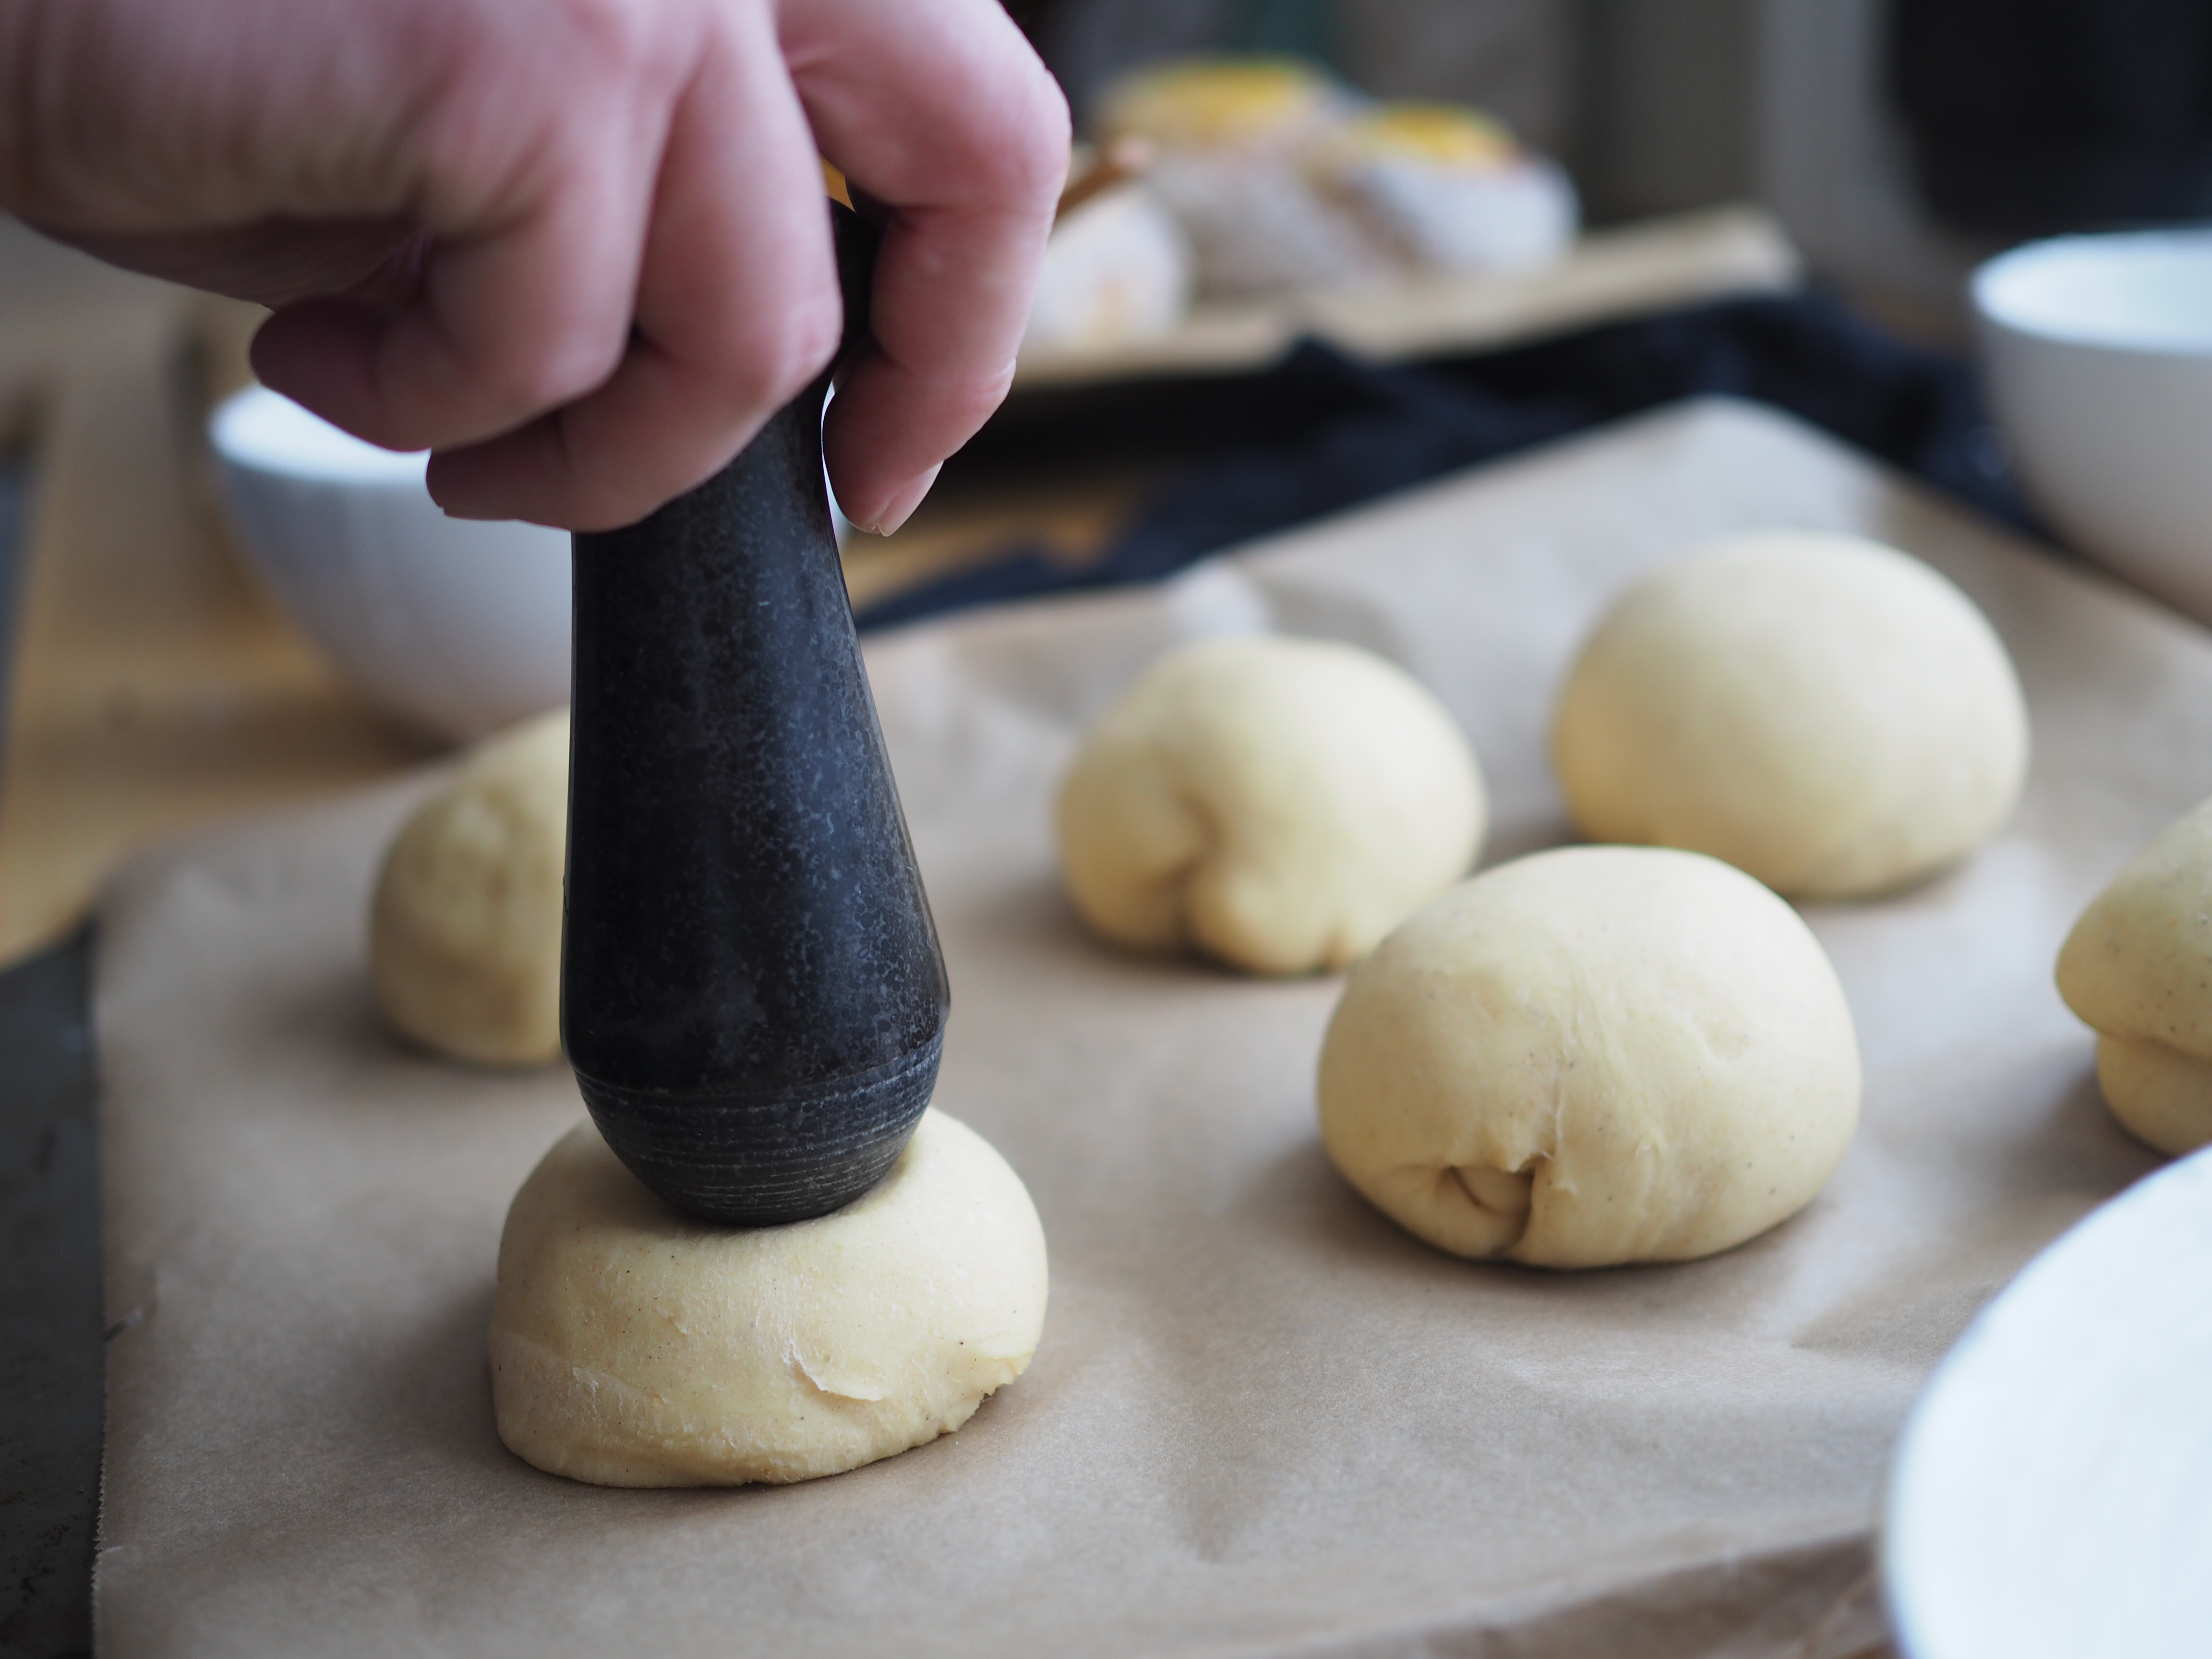
When the buns are ready, make a nice indentation in the center of each. I like to use the back of my pestle (from my pestle and mortar), but you can use a spoon or anything else that will work. Make sure to press down all the way, as the dough will spring back when baking.
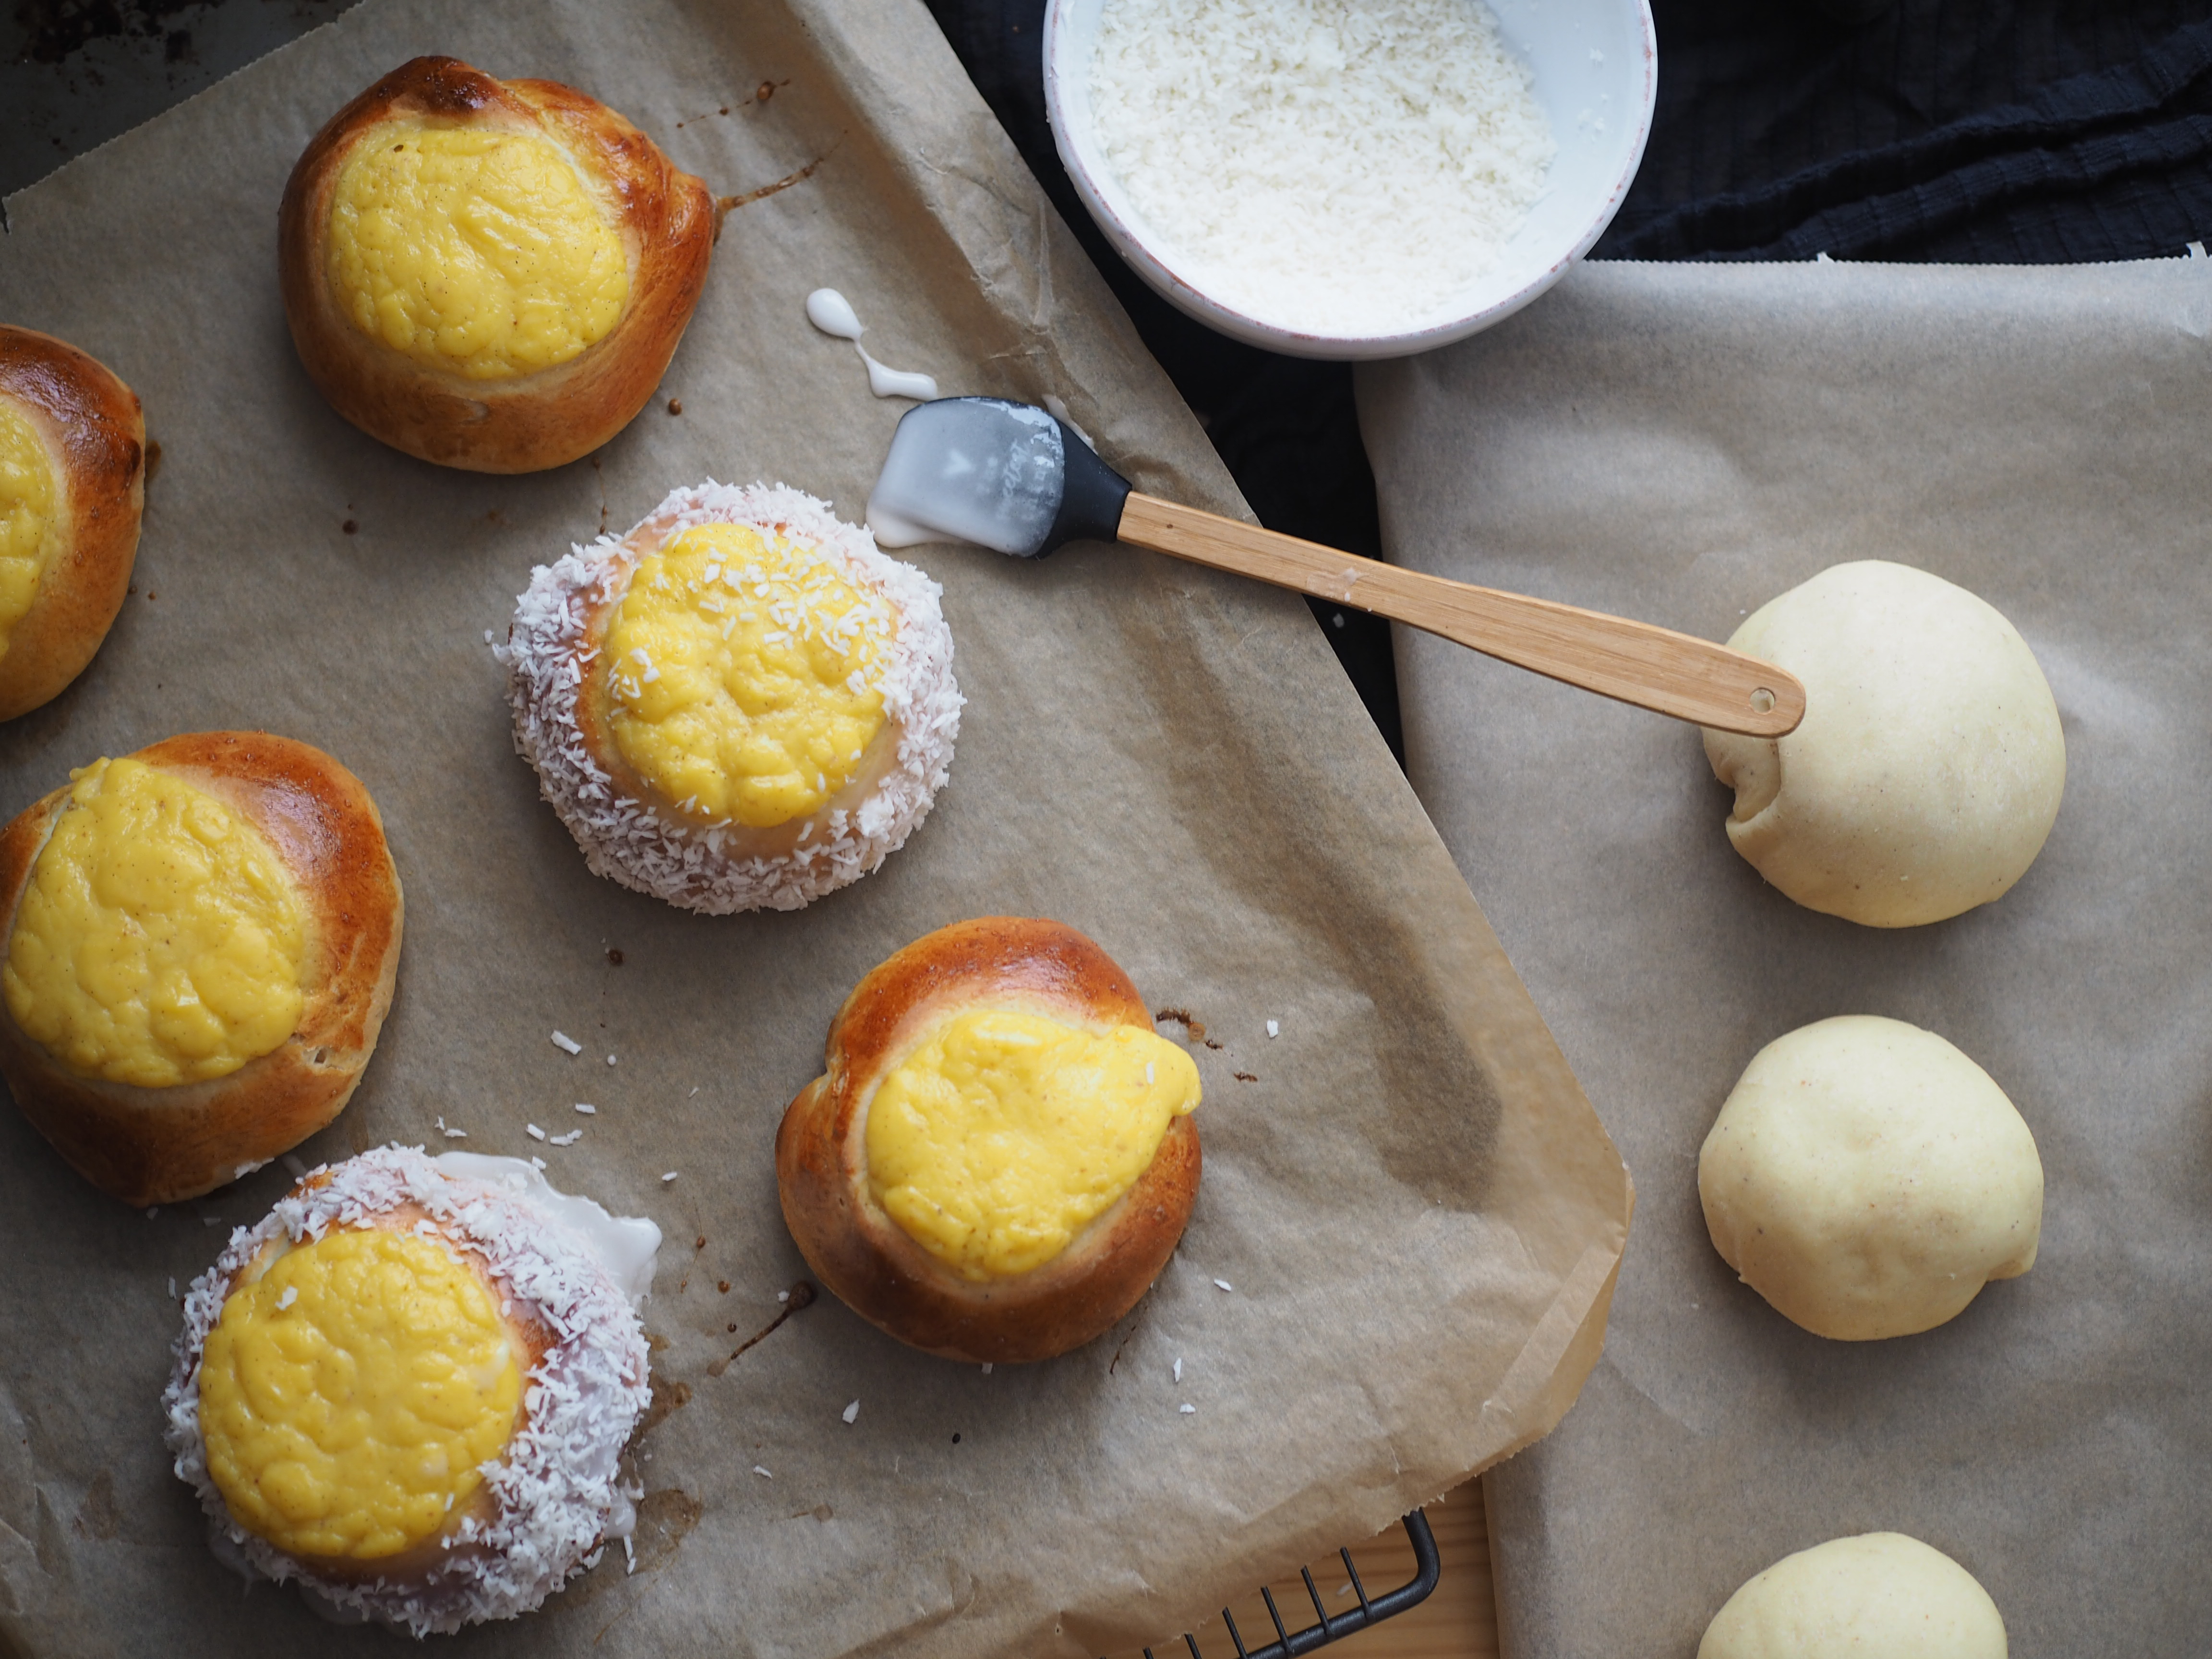
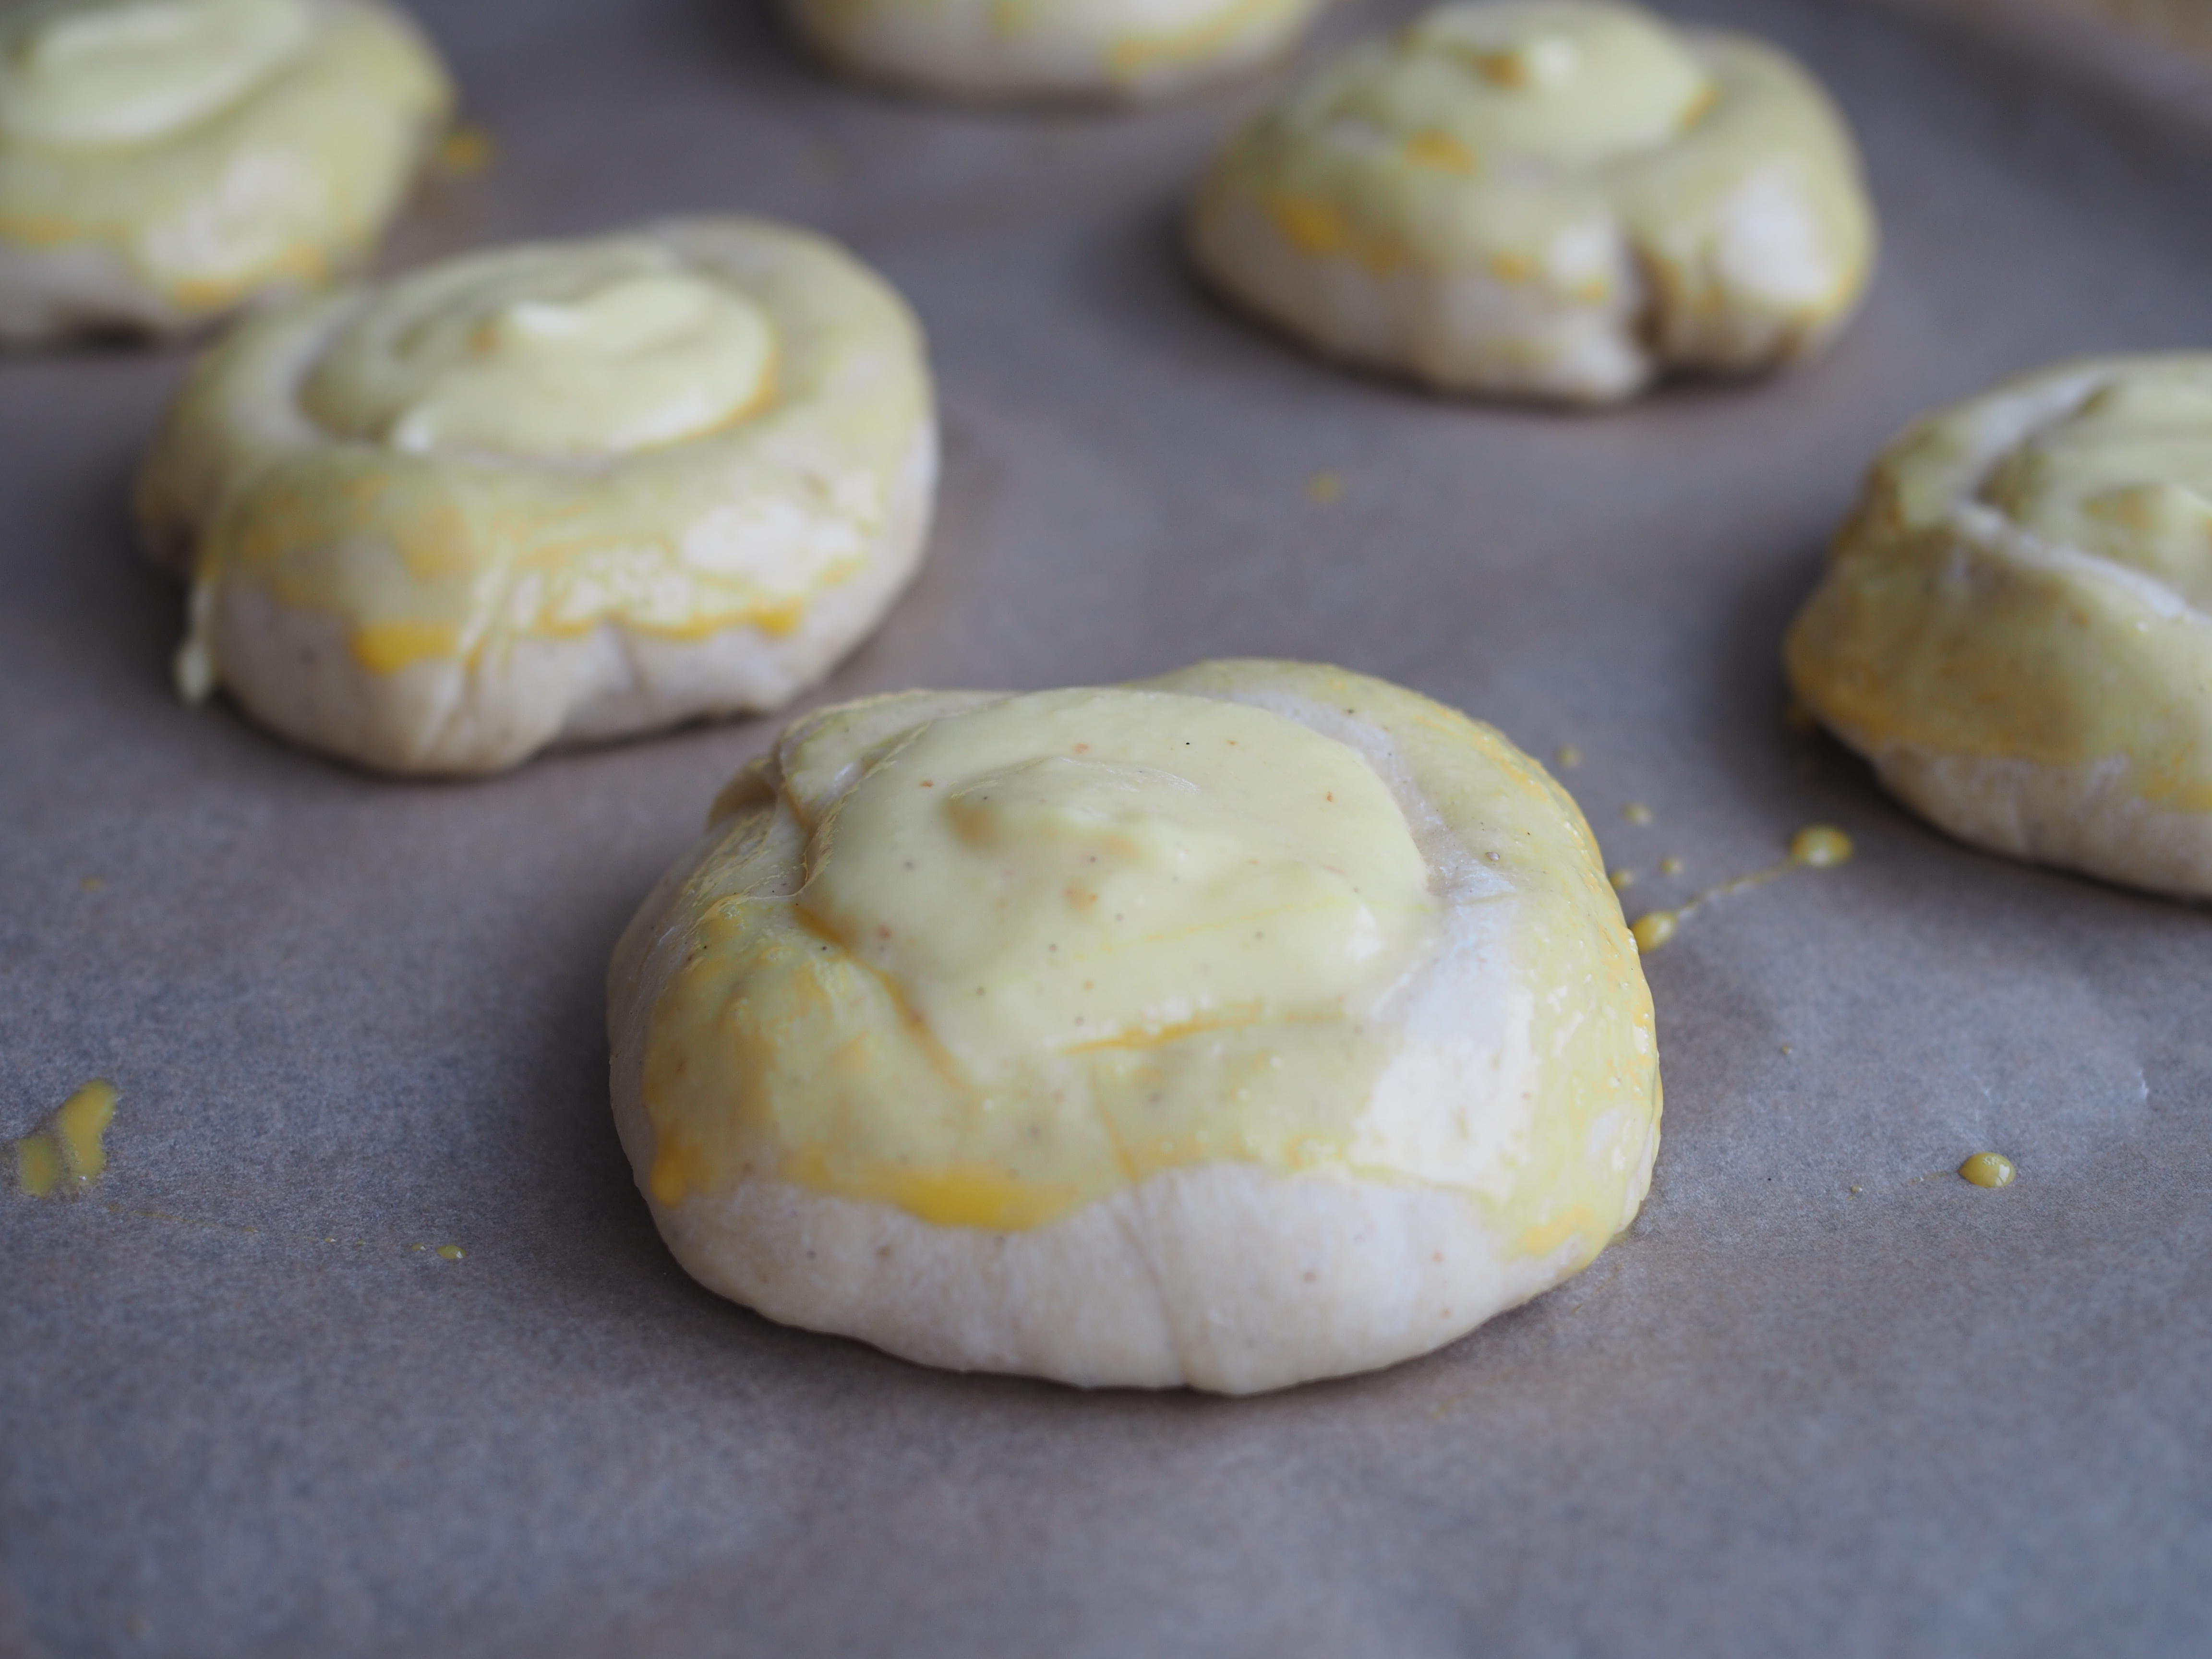
Fill each indentation with about 2-3 Tablespoons of the prepared custard, making sure not to overfill them as the custard might flow over the bun while baking. Brush the sides of each bun with the lightly beaten egg.
Place one of the cooking sheets on the middle rack in the oven and bake for 10-12 minutes (I found 12 minutes to be perfect for me). Repeat for the second batch. Allow the buns to cool completely.
When the buns have cooled, take the glaze and place it around the custard center. I find using a small spatula helps with this. And after you have glazed a bun, immediately press the glazed area into the coconut and rotate until the glaze is completely covered by coconut. It is perfectly fine if some of the coconut gets onto the custard. I think this adds to the homemade look.
Serve immediately! The buns will last up to 2 days, but they won’t be as good as when they were freshly baked.


I have not made these in years, but your blog post inspired me to make a batch (of 12-øres, which they are called where I’m from). I used you recipe and adapted it to my sour dough starter, and it worked out wonderfully!
Hi Marie, that’s fantastic! I’m so glad to hear you got back in the kitchen to make a batch of these – and what a great idea to use a sourdough starter. I will have to try that one day as well! 🙂
Our younger son was happily home for winter break today, but our older son reluctantly went back to school this morning. We decided to make your skoleboller as a special afterschool treat for him. They turned out delicious! Thank you for the great recipe.
That’s wonderful to hear! Skoleboller will make any day a little bit better 🙂
My partner’s birthday is next week and I was hoping to make him skoleboller as he is originally from Norway. I am a college student, however, and do not own a food mixer with a dough hook. Any suggestions?
Hi Madeline, thanks for the question. If you don’t have a food mixer, no worries! You can simple knead the dough by hand for 10 – 15 minutes, or until the dough is quite soft and elastic. I hope your partner has a fantastic birthday and enjoys the skoleboller!
On a cold snowy day in the UK what else is there to do but bake skoleboller? These bring back great memories of our trip to Oslo. Thanks for all your recipes, my daughter loves Norway and we have enjoyed many delights from your site.
Thank you Joy, that is so great to hear! And I agree that baking on a cold, snowy day is a must! Skoleboller…even better 🙂
Amazing! Skoleboller and semlor are two of my favorite Norwegian treats. My husband and I went to Norway for our honeymoon in 2015 and ate a bit too many skoleboller, if there’s even such a thing! I still dream about Norway and its sweet breads. Thank you for sharing this recipe with us.
There can never be too many skoleboller 😉 haha. But I agree, Norway has some of the best treats around. Thanks for sharing!
I can’t wait to try these!
Do you think I could make mini skolebrod and if so, how long should I bake them for?
Thank you
Thanks Susan! Yes, you could make smaller ones if you like. I would 1/2 the baking time and just keep an eye on them.
Hello there! Thank you for sharing this recipe. I made it a few months ago and My partner and I liked it so much that we would like to make it again to share with my family when we go home for Christmas. I was wondering if you thought that we could make this “overnight” style – letting the dough rise in the fridge overnight and preparing the custard ahead of time, then assembling in the morning to bake. If you have any tips, I would gladly take them!
Thanks again!
Hi! Yes, by all means you can make the dough the day before. After rolling each individual bun and placing them on the baking sheets (before letting them rise for 30 minutes) just cover them with plastic film and place them in the refrigerator – this stops the rising process. Take them out the next day, about an hour or so before baking so they can return to room temperature and rise. Then just fill with the prepared custard and bake as normal and enjoy!
What’s the vanilla extract equivalent? Thanks.
I recommend using the vanilla pod in this recipe, otherwise you can use about 1 teaspoon of vanilla extract.
What’s a thickened custard consistency? Is it when it is giving against the whisk or that it’s just a thick custard and will continue thickening once cooled? Thanks.
You want the custard to thicken to where it can coat the back of a spoon when warm – thick, yet still fluid. Hope this helps!
One of my favorite Norwegian sweets is Skølebrød but I have many family members that can’t tolerate a lot of sugar. Is there anyway I can substitute sugar for something like honey or maple syrup?
Hi Ylva. I have never tried a different substitute, so I can’t advise which is best. I would think that maple syrup or honey for the dough would work fine – the custard will probably need a different sugar substitute though. Let me know how it goes and which subs you end up using!
made your recipe and it was my 1st time ever making bread (seriously!) and it was such a crowd pleaser!! Thanks!!
i’m so happy to hear that! here’s to more baking!!
Ayo! As I was born in Norway but now live in Denmark, I miss skolebrød everyday! I just made a batch and they look wonderful! They just came out the oven and I’m really impressed with the recipe and myself. The only thing that I felt like I didn’t do well, was the custard. It came ended being white and not yellow. Do you know why that is? I used all the ingredients that you had in the recipe.
Hi Omar. I’m so glad you made a batch of these! Regarding the custard, I’m unsure why it would come out more white in color. Did you use only the egg yolks? If so, it might be the eggs you used. I get my eggs from our hens, so the yolk has a rich, yellow color naturally. Store eggs often have a lighter yolk color.
Any advice to keep a batch lasting longer than two days? Freezing the dough? Or freezing the whole bun once baked? Can’t wait to try it!
Hi! Yes, you can freeze them after they have cooled from baking, but without the glaze and coconut. When you want some, just thaw them on the counter and then heat them up a little in the oven (low heat for a couple of mintues) before applying the glaze and coconut. Enjoy!
Hi Nevada! This was an amazing recipe! I decided to try this after seeing an IG post on them, and while searching the internet, this recipe came up. They turned out great!!! The only modification I made to your recipe was to make it half AP flour, half bread flour for that extra chewiness when biting into the bun. I have never been to Norway but I could imagine falling in love with all their baked goods. Thanks again 😀
I’m so happy to hear that, Marianela! And thanks for noting how it turned out with a mixture of AP flour and bread flour 🙂
Can I substitute pure vanilla extract for the vanilla bean? How much?
You certainly can! Just substitute the vanilla bean for 1/2 teaspoon of vanilla extract.
I made these last night as a “quarantine” project and they turned out really well. I coiled the dough so it made a sort of Danish (as it appears in your photos) and the final Skoleboller look really professional, like something I purchased at a bakery. Thanks for this great recipe!
Hi Gina, I’m so happy you made these and enjoyed them! 🙂
My daughter, part of a world wide teacher group, heard about these and shared how our family makes Christmas bread and loves cardamom. We will be adding this to our family’s get together list.
It such a lovely thing to share food culture with one another across the globe. I hope you will really enjoy this recipe!
I made these today and am so impressed with the recipe! They turned out wonderfully.
I’m so happy to hear that, Nicole!
This recipe is delicious. I was worried because so many steps. But, the explanation is very clear and I watched the video a couple times.
I’m so glad you enjoyed these!
So beautiful we made these today they were wonderful
Very happy to hear that!
Turned out wonderful! I loved the custard, especially. Thank you for you help with the subsitution, it worked beautifully!
I’m so glad it worked well for you!
These were wonderful! Thank you for your help with the substitution, it worked wonderfully!
Do you use cold or room temp butter when making the Boller?
Cold butter 🙂